
Title: Mastering Smartphone Photography: A Comprehensive Guide to Capturing Stunning Photos

1. Understanding Your Android Or Iphone Camera
Exploring the camera app and its features:
Launching the camera app: Open the camera app by tapping on its icon on your home screen or in the app drawer. On some devices, you can also access the camera quickly by swiping up from the lock screen or pressing the dedicated camera button.
Switching between front and rear cameras: Most camera apps have a button or an icon to switch between the front-facing and rear-facing cameras. Tap on it to toggle between the two.
Zooming: You can zoom in or out by either pinching in or out on the screen or using the zoom slider, depending on the camera app and device. Note that digital zoom reduces image quality, so it's generally better to get closer to your subject rather than relying heavily on digital zoom.
Shooting modes: Camera apps offer various shooting modes to cater to different scenarios and preferences. These modes can include Auto, Portrait, Night, Panorama, Pro, HDR, and more. Explore these modes to see which ones suit your needs best.

Understanding the different shooting modes and their applications:
Auto mode: This is the default mode and is designed to automatically adjust settings like exposure, focus, and white balance for general shooting conditions. It's ideal for everyday photography when you want the camera to handle most of the technical aspects.
Portrait mode: This mode is designed to create a shallow depth of field effect, blurring the background and keeping the subject in focus. It works well for capturing professional-looking portraits or isolating subjects from the surroundings.
Night mode: Available on many newer smartphone models, Night mode helps capture better low-light photos by using long exposure and advanced algorithms. It reduces noise, improves detail, and enhances overall image quality in dark environments.
Panorama mode: Panorama mode allows you to capture wide-angle photos by panning the camera across a scene. It stitches multiple images together to create a single, wide image. This mode is useful for capturing landscapes or large group shots.
Pro or Manual mode: Pro mode gives you more control over settings like ISO, shutter speed, white balance, and focus. It's beneficial for experienced photographers or those who want to have precise control over the camera settings.

Basic Technical Cheat Sheet
Adjusting settings like exposure, focus, and white balance:
Exposure: Exposure determines the brightness of your photo. In most camera apps, you can adjust exposure by tapping on the screen where you want to set the focus and exposure. Once the focus square appears, you can swipe up or down to adjust the exposure level manually.
Focus: To set the focus on a specific subject, tap on that subject on the screen. Many camera apps also offer options like tap to focus, continuous autofocus, or tracking autofocus. Experiment with different focus modes to achieve the desired focus on your subject.
White balance: White balance helps ensure accurate colors in your photos by compensating for different lighting conditions. Most camera apps have automatic white balance, but you can also manually adjust it by accessing the white balance settings. Options often include presets like daylight, cloudy, incandescent, fluorescent, and more.
It's important to note that the specific features, shooting modes, and settings may vary slightly between different Android and iPhone models and camera apps. Take some time to explore your camera app's interface, read the device's user manual, and experiment with different settings to become familiar with the capabilities of your specific smartphone camera.

Composition Cheat Sheet
3. Composition Techniques for Impactful Photos
- Rule of thirds and gridlines for balanced composition
- Framing and leading lines to guide the viewer's eye
- Creating depth and visual interest in your photos
In addition to the techniques already mentioned, there are several other composition techniques you can use to create impactful photos. Here are a few more:
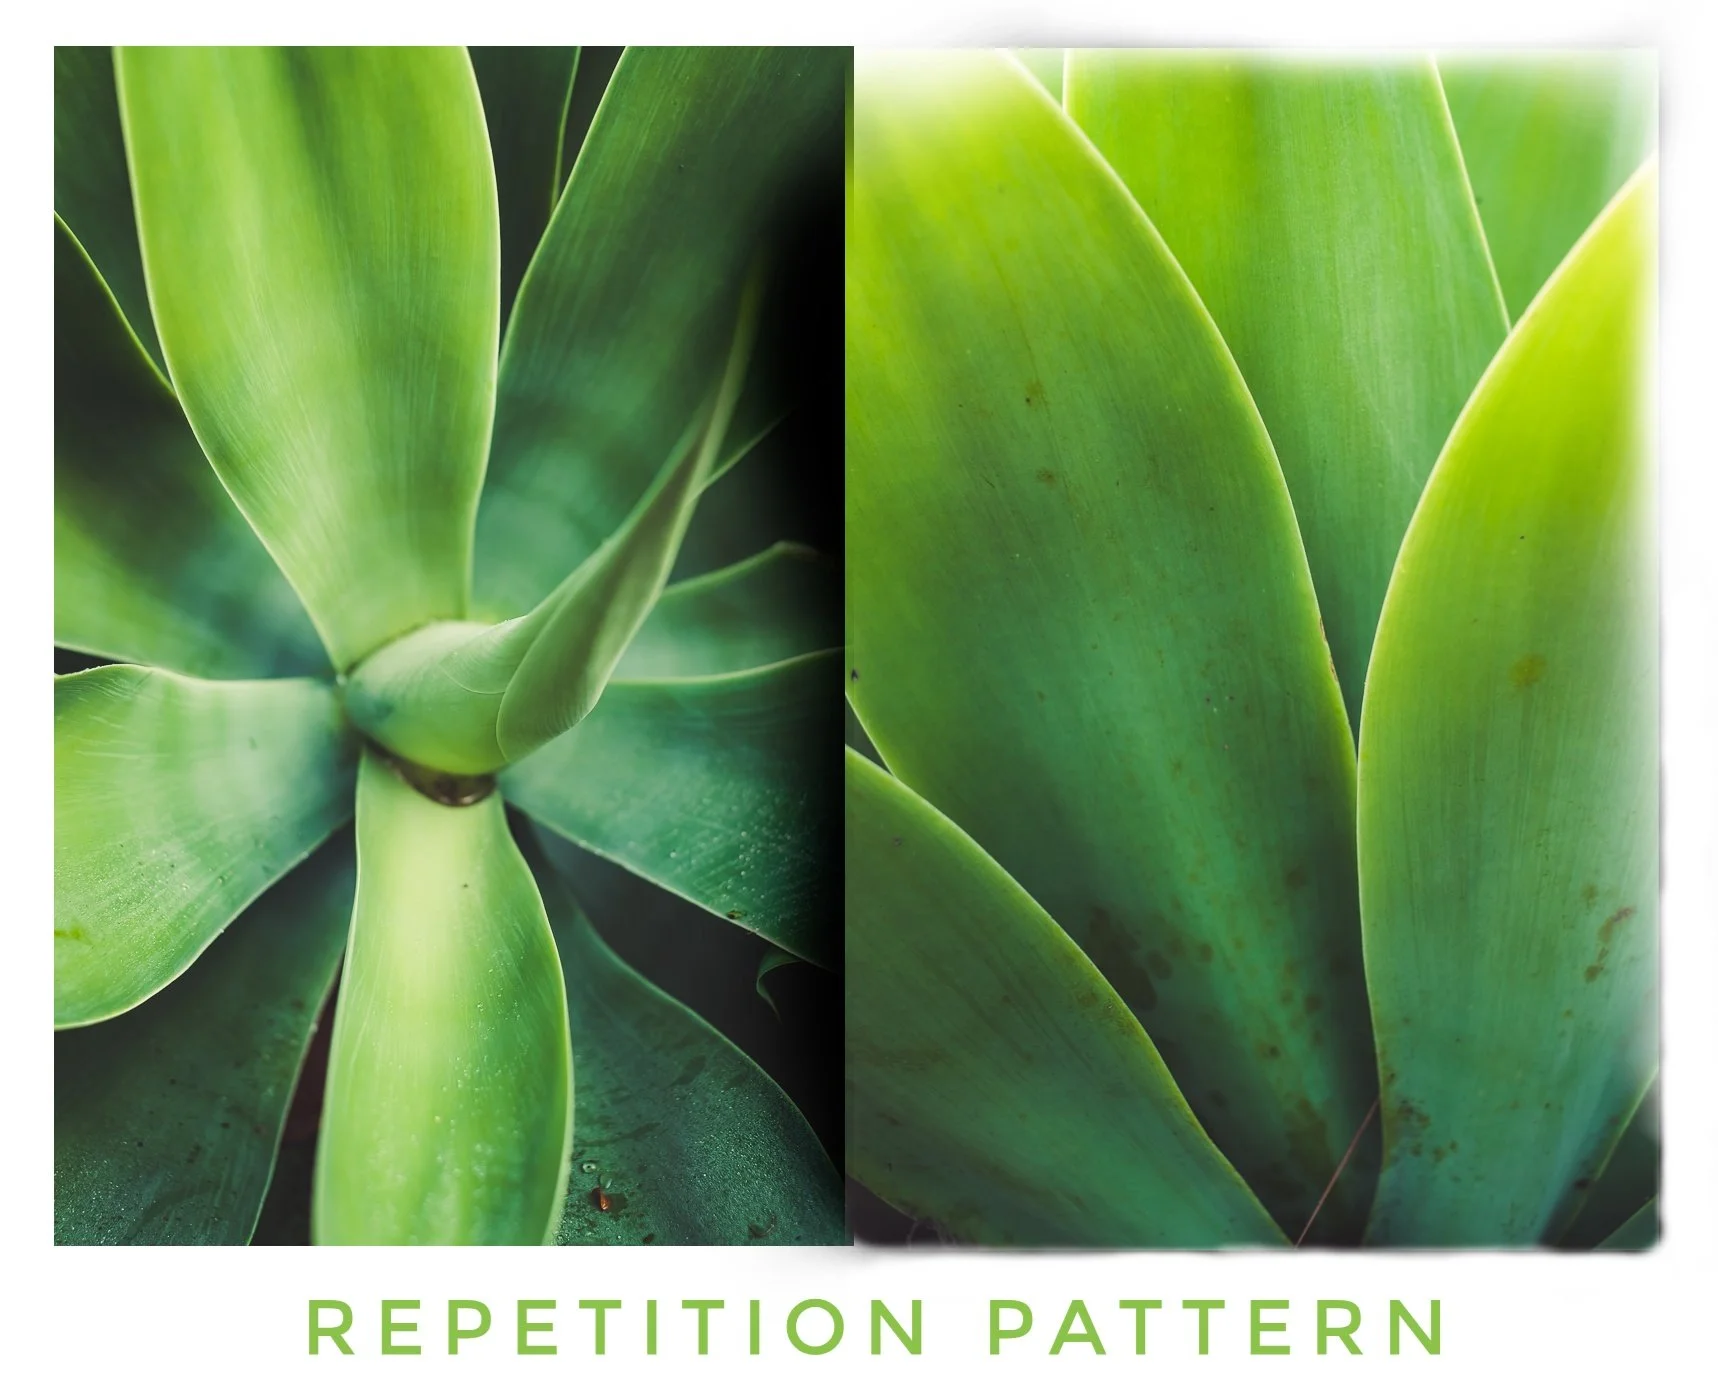
Symmetry and Patterns: Incorporating symmetry or repetitive patterns can create a sense of harmony and visual interest in your photos. Look for naturally occurring patterns or architectural elements that can be used to create a balanced composition.
Fill the Frame: Get close to your subject and fill the frame with it. This can create a strong visual impact and draw the viewer's attention directly to your subject. Avoid unnecessary clutter in the background to keep the focus on your main subject.
Negative Space: Utilize negative space, which is the empty area surrounding your subject, to create a sense of simplicity and emphasize your subject. Leaving empty space can help in highlighting the main subject and conveying a feeling of minimalism.
Point of View: Experiment with different angles and perspectives to add a unique visual element to your photos. Shoot from high or low angles, or try shooting from unusual vantage points to provide a fresh and interesting viewpoint.
Color and Contrast: Consider the color palette and contrast in your photos. Complementary colors can create harmony, while contrasting colors can add visual impact and make your subject stand out. Pay attention to the light and shadows as well, as they can add depth and dimension to your composition.
Breaking the Rules: While guidelines and techniques can be helpful, don't be afraid to break the rules and experiment with unconventional compositions. Sometimes, breaking the rules can lead to the most impactful and unique photos.
Remember, composition is subjective, and what works for one photo may not work for another. Experiment with different techniques and find a style that resonates with you. Ultimately, the most impactful photos are the ones that evoke emotions and tell a compelling story.
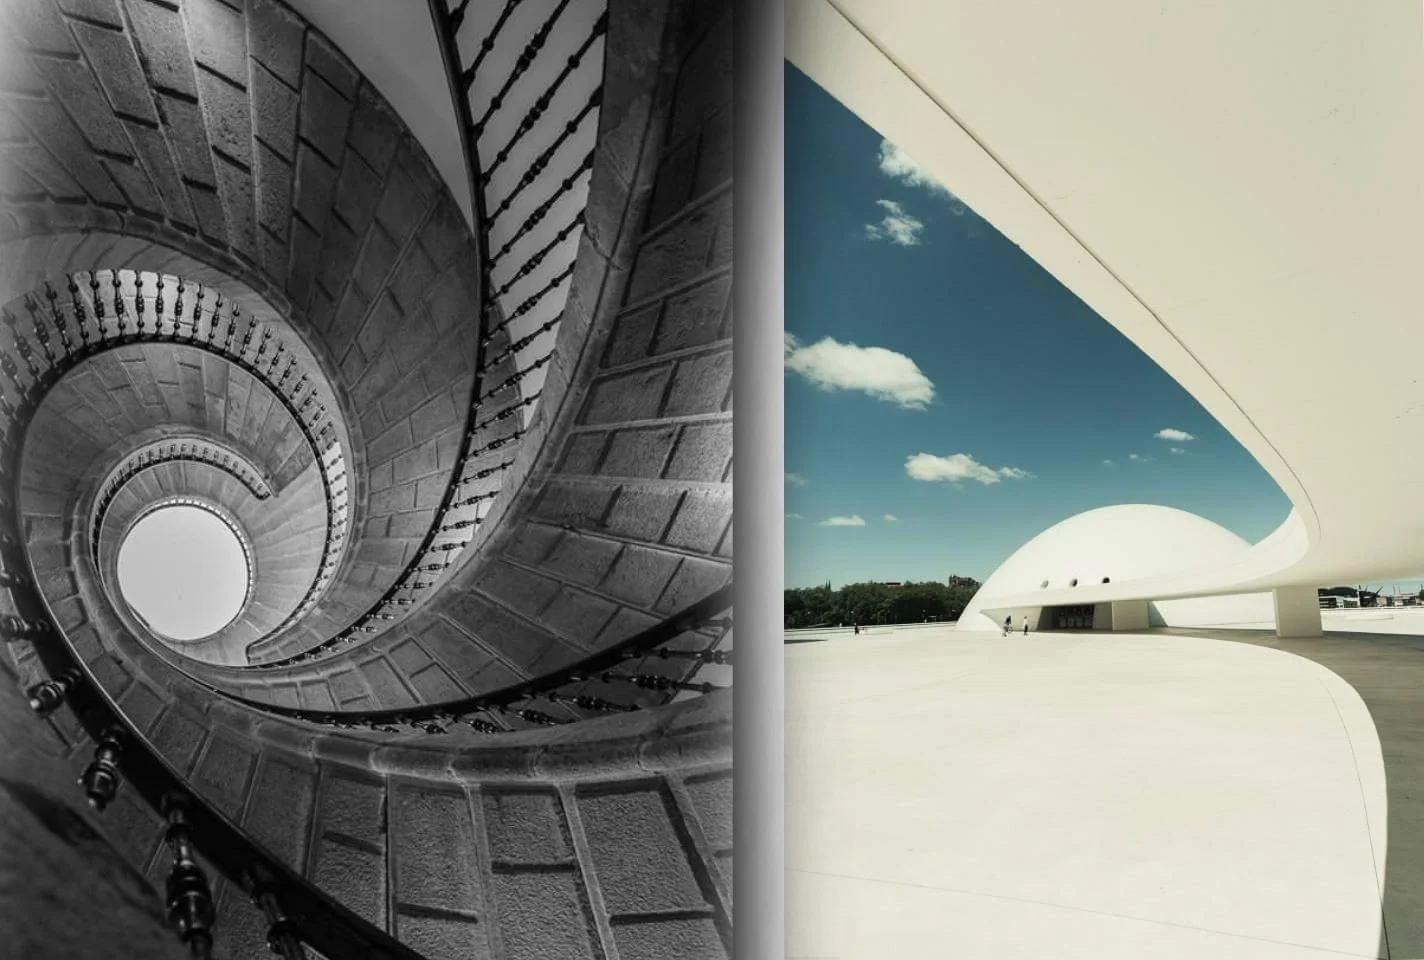
Spanish Architecture - Old & Modern
4. Mastering Lighting and Exposure
Mastering lighting and exposure is crucial for capturing well-balanced and visually appealing photos. Whether you're using natural light or artificial lighting sources, understanding how to utilize and control light effectively can greatly enhance the quality of your images. Let's delve into each of the aspects you mentioned: utilizing natural light, overcoming common lighting challenges, and controlling exposure.
Utilizing natural light for optimal results:
Observe the quality of light: Pay attention to the direction, intensity, and color temperature of the natural light available to you. Different times of day, weather conditions, and geographical locations can significantly impact the lighting conditions.
Golden hour and blue hour: The golden hour occurs shortly after sunrise and before sunset, providing soft, warm, and flattering light. The blue hour refers to the period just before sunrise and after sunset when the sky has a cool blue tone. Both these times offer unique and atmospheric lighting for photography.
Diffuse harsh light: When faced with harsh sunlight, try diffusing the light using various techniques like shooting under shade, using translucent materials, or employing reflectors and diffusers to soften and spread the light more evenly.
Use backlighting creatively: Backlighting occurs when the light source is behind the subject. It can create dramatic silhouettes or illuminate the subject with a halo effect. Experiment with positioning your subject in relation to the light source for interesting and creative effects.
Overcoming common lighting challenges:
High contrast scenes: In situations where there is a stark contrast between bright and dark areas, such as shooting outdoors on a sunny day, it can be challenging to capture details in both the highlights and shadows. Use techniques like bracketing, HDR (High Dynamic Range) photography, or exposure blending in post-processing to merge multiple exposures and retain details across the entire scene.
Mixed lighting conditions: When shooting in environments with different light sources, such as indoors with artificial and natural light sources, it can cause color casts and uneven lighting. One way to handle this is to manually adjust the white balance settings on your camera or use post-processing tools to correct the color temperature.
Low light situations: In low light conditions, such as indoors or during nighttime, you'll need to consider using a wider aperture, increasing ISO sensitivity, using a tripod to avoid camera shake, and employing artificial lighting sources like flashes or continuous lights to illuminate your subject effectively.
Controlling exposure for well-balanced photos:
Understand the exposure triangle: Exposure is determined by the combination of three factors: aperture, shutter speed, and ISO sensitivity. Learn how these elements interact with each other and adjust them accordingly to achieve the desired exposure.
Histogram and exposure metering: Utilize the histogram on your camera to analyze the distribution of light and avoid underexposure or overexposure. Additionally, experiment with different metering modes (evaluative, spot, center-weighted) to accurately measure the light falling on your subject.
Exposure compensation: Use exposure compensation to override the camera's automatic exposure settings. Increase it (+) to brighten the image or decrease it (-) to darken it, depending on your creative intentions.
Manual mode: Switching to manual mode allows you to have full control over aperture, shutter speed, and ISO. It gives you the flexibility to balance exposure and achieve the desired creative effects.
Remember, practice is key when it comes to mastering lighting and exposure. Experiment with different lighting conditions, learn from your results, and continuously refine your techniques to improve your skills as a photographer.
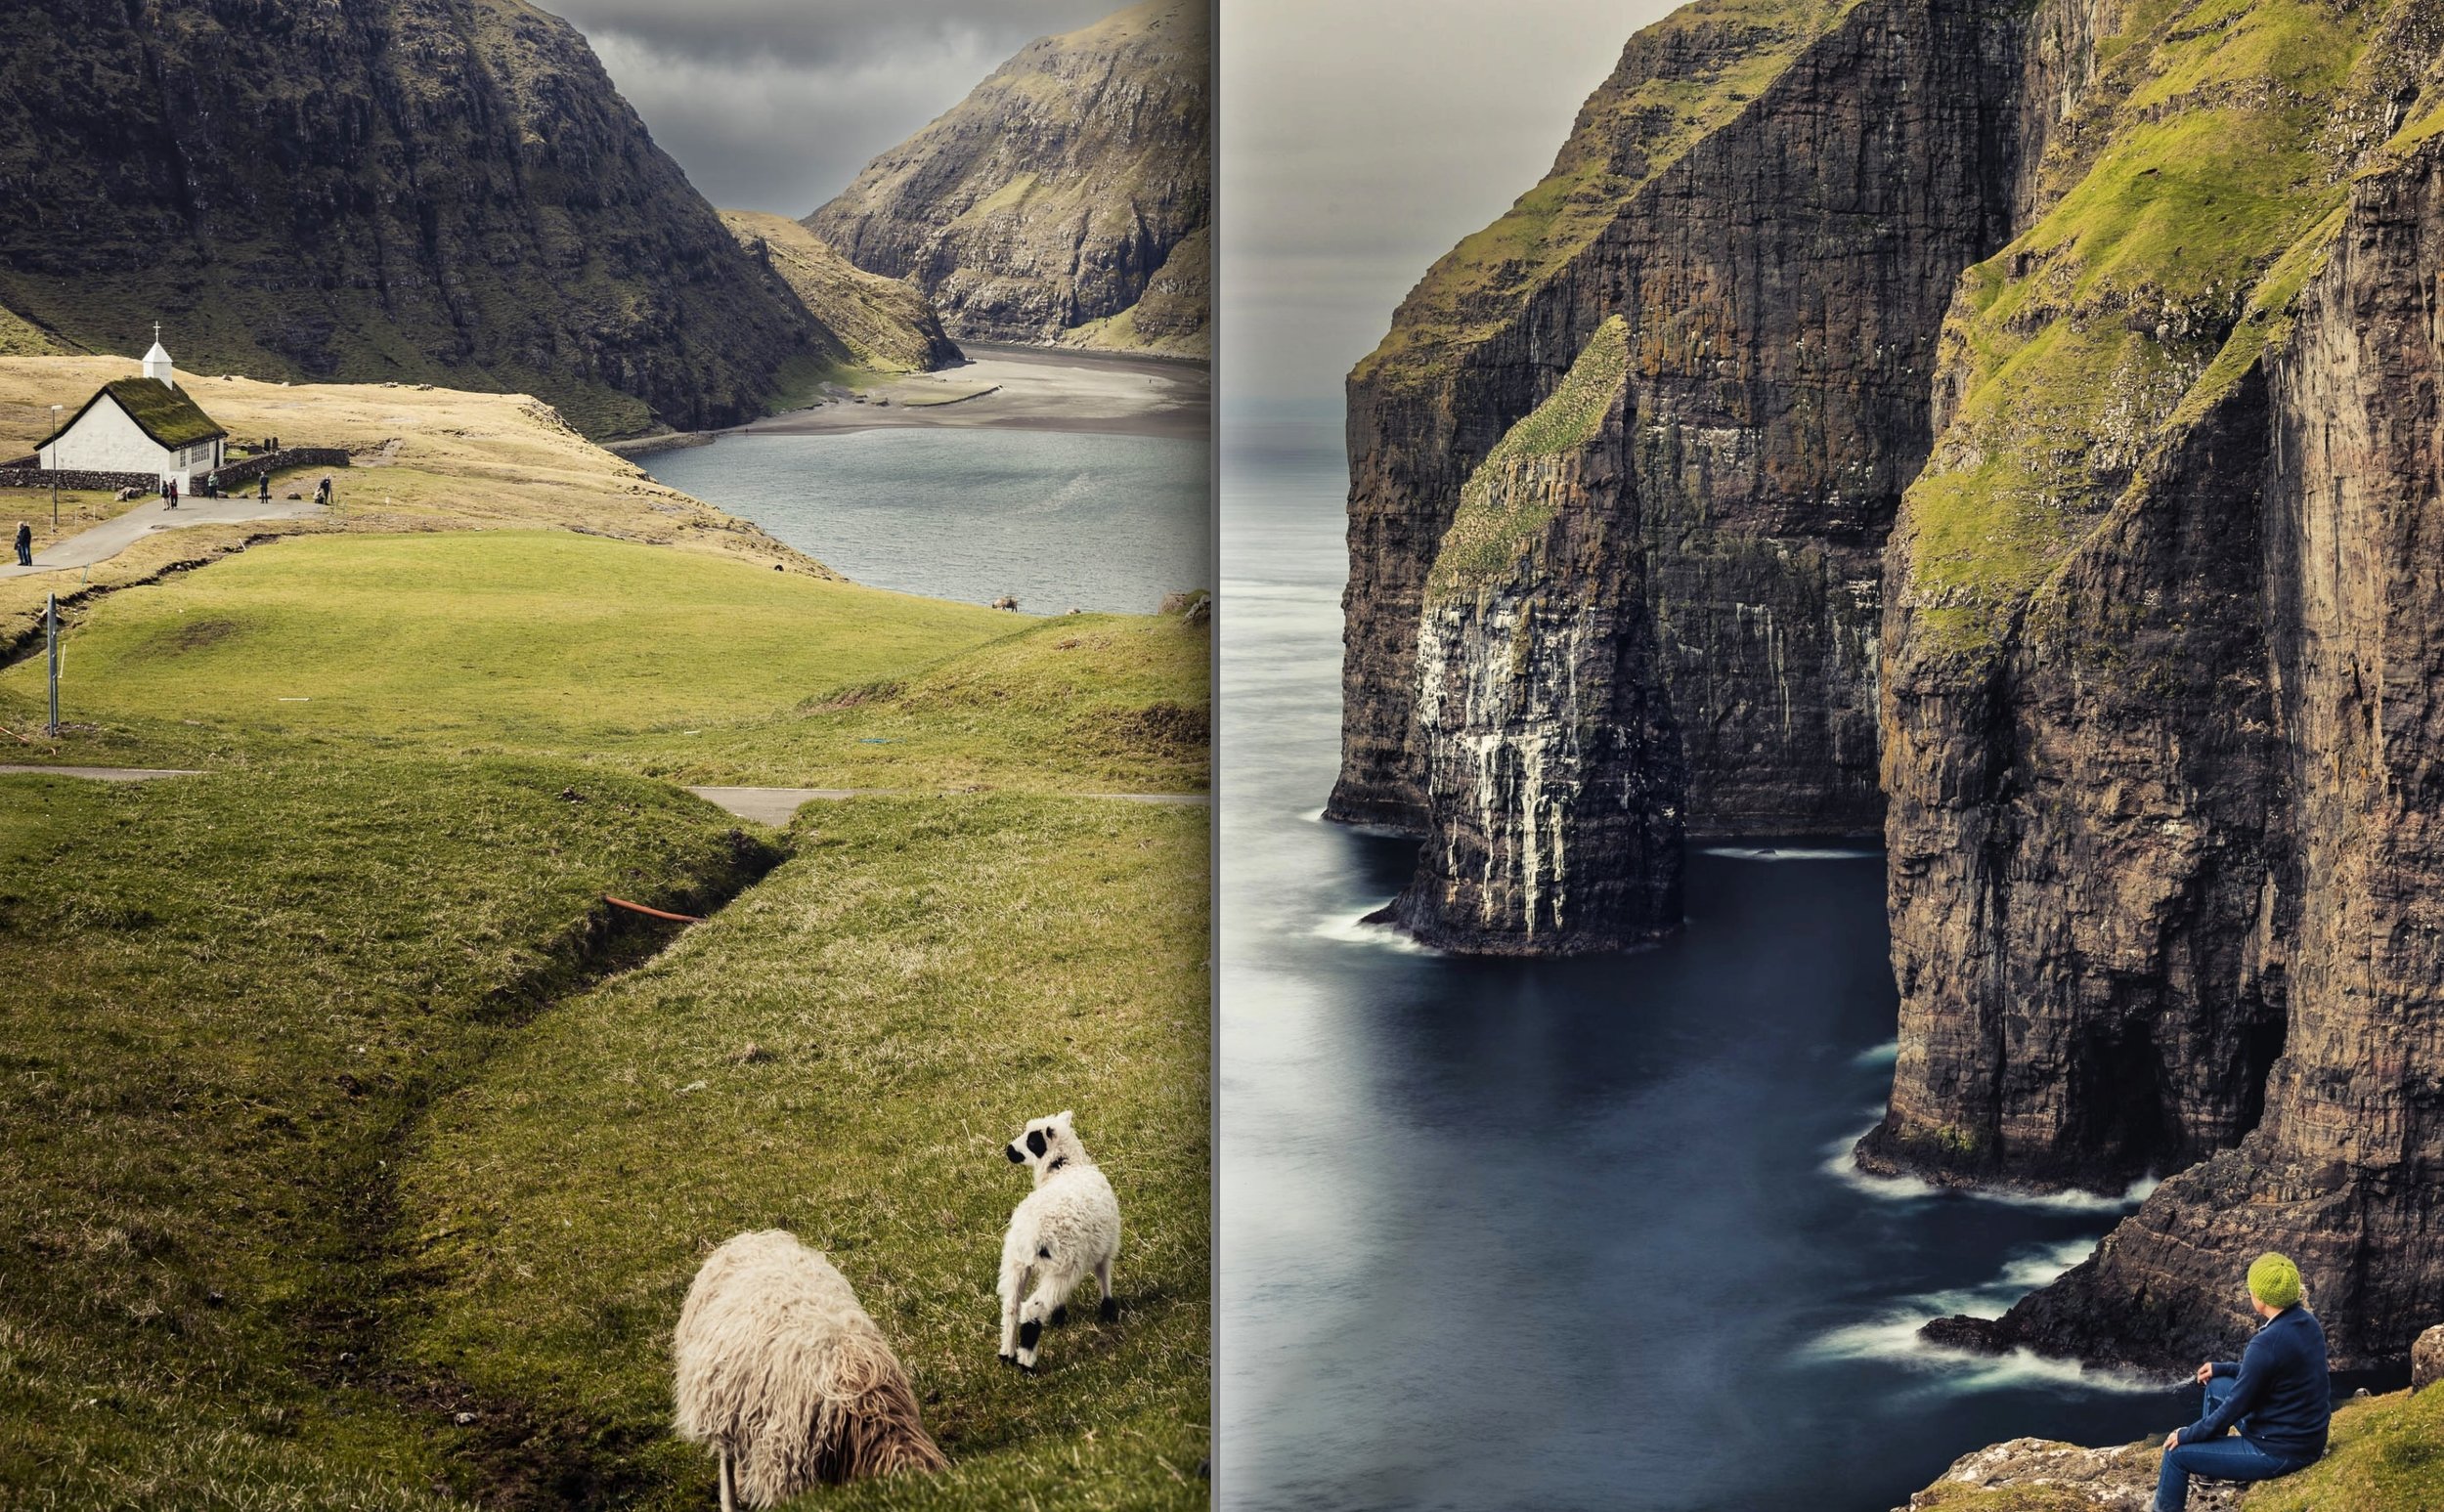
Faroe Islands Landscapes
5. Focus and Depth of Field
Smartphone photography has come a long way, and modern smartphones are equipped with advanced camera systems that can capture stunning images. Understanding how to effectively use autofocus and manual focus, achieve shallow depth of field, and capture sharp and focused photos will help you take professional-looking smartphone photographs. Let's dive into each of these topics:
Autofocus and Manual Focus:
Autofocus: Most smartphones have an autofocus feature that automatically adjusts the focus based on the subject in the frame. To use autofocus effectively, simply tap on the subject you want to focus on in the camera app. The camera will adjust the focus accordingly. Some smartphone cameras also offer face detection, which can be useful for portrait photography.
Manual Focus: While not all smartphones have manual focus controls, some high-end models do provide this feature. Manual focus allows you to have full control over the focus point, especially when shooting subjects that may confuse the autofocus system. In the camera app, look for manual focus controls, which may appear as sliders or a focus ring. Use these controls to adjust the focus manually until the subject appears sharp in the viewfinder.
Achieving Shallow Depth of Field:
Distance to Subject: To achieve a shallow depth of field, you need to create a separation between the subject and the background. Get closer to your subject while keeping the background as far away as possible. This will help blur the background and create a more prominent subject separation.
Portrait Mode: Many smartphones offer a dedicated Portrait Mode that simulates shallow depth of field by using software algorithms. Enable this mode in your camera app and follow the instructions to ensure the subject is within the specified distance range. Portrait Mode can produce impressive results with a blurred background.
Third-Party Apps: If your smartphone doesn't have a built-in Portrait Mode, you can explore third-party camera apps that offer manual controls, including depth-of-field adjustments. These apps may provide more flexibility in achieving shallow depth of field effects.
Techniques for Capturing Sharp and Focused Photos:
Stability: Keeping your smartphone stable while capturing photos is crucial for sharpness. Hold the phone with both hands, tuck your elbows against your body, and stand or brace yourself against a stable surface. Alternatively, consider using a tripod or smartphone stabilizer for maximum stability.
Focus Lock: Use the autofocus feature to focus on the subject, and once it's locked, recompose the shot if needed. This prevents the camera from refocusing when you press the shutter button.
Burst Mode: When capturing moving subjects or in low-light conditions, use burst mode to capture a series of photos in quick succession. This increases the chances of obtaining a sharp image by reducing the impact of camera shake.
Manual Exposure: Some camera apps allow you to manually adjust exposure settings. If the lighting conditions are challenging, consider decreasing the exposure to avoid overexposure, which can reduce image sharpness.
Remember, practice is key to improving your smartphone photography skills. Experiment with different techniques, settings, and shooting conditions to understand how your smartphone camera performs in various scenarios. Additionally, exploring online tutorials and photography communities can provide valuable insights and inspiration to enhance your skills further.

Snapseed Editing App
6. Enhancing Your Photos with Editing Apps
Introduction to popular photo editing apps:
In recent years, photo editing has become increasingly popular, thanks to the rise of smartphones and the accessibility of powerful editing apps. These apps provide a range of tools and features that allow users to enhance their photos and create stunning visual effects. Here are some popular photo editing apps that you can consider:
Adobe Lightroom: Lightroom is a comprehensive photo editing app that offers a wide range of editing tools and presets. It is known for its advanced features like selective editing, curves adjustment, and lens correction.
Snapseed: Developed by Google, Snapseed is a user-friendly app with a wide array of editing tools. It offers features like selective editing, healing brush, and perspective correction. Snapseed also includes a variety of filters and effects to enhance your photos.
VSCO: VSCO is popular among photography enthusiasts for its film-inspired presets and minimalist interface. It offers a range of editing tools, filters, and effects. VSCO also features a vibrant community where users can share their edited photos.
Adobe Photoshop Express: Photoshop Express is a simplified version of the desktop software, offering essential editing tools like cropping, straightening, and adjusting exposure. It also includes filters and effects to enhance your images.
Afterlight: Afterlight is known for its wide selection of filters, textures, and overlays. It also provides basic editing tools like cropping, rotating, and adjusting brightness and contrast.
Basic editing tools and techniques for enhancing your photos:
Once you've chosen a photo editing app, here are some basic tools and techniques you can use to enhance your photos:
Crop and Straighten: Use the cropping tool to remove unwanted elements or to improve the composition of your photo. Additionally, straighten the image if it appears tilted.
Adjust Brightness, Contrast, and Saturation: These are fundamental adjustments that can greatly impact the overall look of your photo. Increase brightness to make the image brighter, adjust contrast to enhance the difference between light and dark areas, and tweak saturation to control the intensity of colors.
Sharpening and Clarity: To make your photo appear sharper and more defined, use the sharpening tool. The clarity tool enhances mid-tone contrast, giving your image more depth and detail.
White Balance: Adjusting the white balance helps correct the color temperature of your photo. If the image appears too warm (yellowish), cool it down; if it appears too cool (bluish), warm it up.
Spot Healing and Clone Stamp: Use the spot healing tool to remove small blemishes or unwanted objects from your photo. The clone stamp tool allows you to duplicate a specific area and cover imperfections.
Filters and Presets: Most photo editing apps offer filters and presets that can instantly transform the look of your photo. Experiment with different styles to find the one that suits your vision.
Remember, the key to successful editing is moderation. Avoid going overboard with adjustments and effects, as it can result in an unnatural-looking photo. Take the time to practice and develop your editing skills to achieve the desired results.

Snapseed Editing App
7. Creative Editing Techniques
Double exposure: Overlaying two or more images to create a unique and blended effect. This technique can produce surreal or ethereal results.
HDR (High Dynamic Range): Capturing multiple exposures of the same scene and merging them together to achieve a greater dynamic range. This technique is useful for scenes with extreme contrasts between light and shadow.
Long exposure: Capturing an image with a longer shutter speed, often using a tripod, to create motion blur or capture light trails. This technique is commonly used for night photography or capturing the movement of water.
Multiple exposures: Taking multiple shots of different subjects or scenes and combining them into a single image. This technique allows you to create a composite image with various elements.
Panoramic stitching: Capturing multiple images of a scene and stitching them together to create a wide-angle or panoramic view. This technique is useful when you want to capture a broader perspective that cannot fit in a single frame.
Tilt-shift: Using specialized lenses or post-processing techniques to create a selective focus effect, making a scene appear as a miniature model. This technique can give a unique and whimsical look to your photos.
Color grading: Manipulating the colors and tones of an image to create a specific mood or aesthetic. This can be achieved through selective adjustments of hues, saturation, and contrast, or by using software tools for advanced color grading.
Collage and compositing: Combining multiple images or elements to create a new and cohesive composition. This technique enables you to tell a story or create imaginative visuals by blending different elements together.
Reflections and symmetry: Incorporating reflections, both natural and artificial, to add depth and symmetry to your images. This technique can create visually striking and balanced compositions.
Remember, these are just a few examples of creative editing techniques in photography. Experimenting with different techniques and exploring your own artistic vision can lead to unique and captivating results.
- Using selective editing to make targeted adjustments
Selective photo editing is a powerful technique that allows you to make targeted adjustments to specific areas of an image. By selectively editing certain parts of a photo while leaving others untouched, you can enhance specific elements, correct imperfections, or create artistic effects. There are several methods and tools you can use to achieve selective editing, depending on the photo editing software you are using. Here's a general overview of the process:
Selection Tools: Most photo editing software provides selection tools that allow you to define specific areas of an image. These tools may include the lasso tool, marquee tool, or brush tool. Use these tools to select the area you want to edit selectively.
Adjustment Layers: Adjustment layers are a non-destructive way to make edits to specific parts of an image. They allow you to apply various adjustments without permanently altering the original image. Common adjustment layers include exposure, contrast, color balance, hue/saturation, and more. Once you have made a selection, create an adjustment layer and apply the desired changes to that specific area.
Layer Masks: Layer masks are essential for selective editing as they determine which parts of an adjustment layer are visible or hidden. By using a layer mask, you can precisely control where the adjustments are applied. Paint on the mask with black to hide the adjustment and reveal the original image, or paint with white to apply the adjustment. You can also use shades of gray to create partial adjustments.
Refining the Selection: To ensure precise editing, you can refine the selection or mask by using tools such as feathering, smoothing, or refining edges. These tools help blend the edges of the selection with the surrounding areas for a more natural and seamless appearance.
Multiple Adjustment Layers: Depending on the complexity of your edits, you can create multiple adjustment layers with different settings to achieve the desired effect. Each layer can have its own selection and mask, allowing you to make targeted adjustments to various parts of the image.
Fine-Tuning: After applying the selective adjustments, take a step back and evaluate the overall image. Make any necessary refinements to the adjustments or masks to achieve the desired outcome. You can tweak the opacity of the adjustment layers or use blending modes to further refine the effect.
- Adding text, overlays, and stickers to personalize your photos:This is a fun and creative way to enhance your images. There are several tools and software available that allow you to easily add these elements to your photos. Here are some popular options:
Adobe Photoshop: Photoshop is a powerful and versatile photo editing software that allows you to add text, overlays, and stickers to your photos. You can use the text tool to type in your desired text and customize it with various fonts, sizes, and colors. Additionally, you can import and apply overlays and stickers from external sources or create your own.
Canva: Canva is a web-based graphic design platform that offers a wide range of tools for creating custom designs, including photo editing features. It provides an intuitive interface with drag-and-drop functionality, making it easy to add text, overlays, and stickers to your photos. Canva also offers a vast library of pre-designed elements and templates that you can use for inspiration.
Pixlr: Pixlr is a free online photo editor that offers a range of editing tools, including the ability to add text, overlays, and stickers to your photos. It has a user-friendly interface and provides various customization options for text, such as different fonts, sizes, and colors. Pixlr also offers a collection of overlays and stickers that you can apply to your photos.
Over: Over is a mobile app available for both iOS and Android that specializes in adding text and artwork to your photos. It provides a vast library of fonts, artwork, and templates that you can use to customize your images. Over also offers features like layering, blending modes, and adjustments to help you create unique and personalized designs.
Snapchat: Snapchat is a popular social media app known for its photo and video filters. It offers a wide range of stickers, overlays, and text options that you can apply to your photos before sharing them. Although Snapchat is primarily a social media platform, you can save your edited photos to your device's gallery and use them outside of the app.
These are just a few examples of tools and software available for adding text, overlays, and stickers to personalize your photos. Each option has its own unique features and interface, so you can choose the one that suits your preferences and creative needs.
8. Perfecting Portraits with Your Smartphone
Perfecting portraits with your smartphone has become easier than ever with the advancement of technology. Here are some tips and techniques to help you capture professional-looking portraits using your smartphone:
Utilizing portrait mode for professional-looking portraits: Most modern smartphones come equipped with a portrait mode feature that uses depth-of-field effects to create a blurred background, simulating the look of a professional camera. When using portrait mode, make sure to focus on your subject, as it helps the camera differentiate between the subject and the background. Experiment with different distances and angles to achieve the desired effect. Alternatively you can a lens blur tool in editing with snapseed.
Posing and directing your subjects for captivating results: Posing your subjects properly can greatly enhance the overall look and feel of your portraits. Communicate with your subject and provide clear instructions to capture natural and engaging expressions. Encourage them to relax and be themselves, and try to capture candid moments that showcase their personality. Experiment with different angles, compositions, and poses to add variety to your shots.
Enhancing skin tones and features in portrait photography: To enhance skin tones and features in your portrait photography, you can use various editing tools available on your smartphone. Here are a few techniques:
Adjust exposure and white balance: Use the exposure adjustment feature to balance the overall brightness of the image. Adjust the white balance settings to ensure accurate colors and skin tones.
Use portrait editing apps: There are numerous photo editing apps available that offer features specifically designed for enhancing portraits. These apps provide tools for retouching skin, removing blemishes, and adding subtle enhancements to facial features.
Experiment with filters: Apply filters to your portraits to add mood and style. Many apps offer a wide range of filters that can enhance the overall look and feel of your portraits. However, use filters sparingly and ensure they enhance rather than overpower the image.
Consider natural lighting: When capturing portraits, natural lighting can make a significant difference. Soft, diffused light tends to be the most flattering for portraits. Avoid harsh direct sunlight, as it can create unflattering shadows and highlights on the subject's face.
Remember, practice makes perfect. Take the time to experiment with different techniques, settings, and editing options to find your unique style and achieve the desired results. Additionally, don't be afraid to seek inspiration from professional photographers and study their work to improve your own skills.
9. Capturing Landscapes and Travel Moments
Photographing landscapes and travel moments with a smartphone can yield impressive results if you apply some techniques and follow certain tips. Here are some suggestions to help you capture breathtaking landscapes, compose compelling shots, and utilize panorama mode effectively:
Prepare and Research:
Familiarize yourself with the location you're visiting. Look for iconic landmarks, viewpoints, or interesting natural features that you want to capture.
Check the weather and lighting conditions beforehand. Different lighting conditions can drastically affect the mood and atmosphere of your photos.
Use the Rule of Thirds:
The rule of thirds is a fundamental principle of composition. Imagine your image divided into a 3x3 grid and place key elements of interest along these gridlines or at their intersections. This creates a visually pleasing composition.
Leading Lines and Symmetry:
Look for natural or man-made elements that can lead the viewer's eye into the image, such as roads, rivers, or paths. This adds depth and guides the viewer's attention.
Symmetry can be visually appealing. Seek out symmetrical scenes or subjects, like reflections in water or architectural elements.
Capture Golden Hour and Blue Hour:
The golden hour refers to the period shortly after sunrise or before sunset when the lighting is warm and soft. This time of day can enhance landscapes with beautiful colors and long shadows.
The blue hour occurs just before sunrise or after sunset when the sky takes on a deep blue hue. It can create a magical atmosphere in your photographs.
Experiment with Different Perspectives:
Don't limit yourself to eye-level shots. Get low to the ground for a unique perspective, or find a higher vantage point for a broader view. Changing your perspective can add interest and depth to your images.
Utilize HDR Mode:
High Dynamic Range (HDR) mode can help you capture scenes with a wide range of light and shadow. It combines multiple exposures to create a well-exposed image, especially in high-contrast situations.
Use the Panorama Mode:
Panorama mode is perfect for capturing wide scenic shots, especially when your smartphone may not have a wide-angle lens.
Start by holding your phone horizontally and selecting the panorama mode. Follow the on-screen instructions, keeping the arrow aligned with the guide until you complete the shot. Pan slowly and smoothly for the best results.
Edit and Enhance:
After capturing your photos, take advantage of editing apps or software to fine-tune your images. Adjusting brightness, contrast, and saturation can help bring out the best in your shots.
Remember, the key to capturing breathtaking landscapes and travel moments is to experiment, practice, and develop your own unique style. Don't be afraid to try new techniques and explore different compositions to create stunning photographs.

Kyoto Dusk - Tripod used in night mode
10. Night-time and Low-Light Photography
Nighttime and low-light photography can be a challenging yet rewarding endeavor. With advancements in smartphone camera technology, capturing impressive photos in low-light conditions has become more accessible than ever before. Here are some tips to help you master low-light photography with your smartphone, including utilizing night mode, manual settings, and techniques for capturing cityscapes, fireworks, and astrophotography.
Use Night Mode: Most modern smartphones come equipped with a dedicated night mode feature. Night mode utilizes computational photography techniques to capture multiple exposures and merge them into a single well-exposed image. This mode enhances details, reduces noise, and produces brighter, more balanced low-light photos. When using night mode, keep your hands steady, as the camera will require a longer exposure time.
Experiment with Manual Settings: If your smartphone camera allows manual control, explore the manual settings for low-light photography. Adjusting settings like ISO, shutter speed, and white balance can give you more control over the outcome of your photos. However, be cautious when increasing the ISO as it can introduce digital noise. Lowering the shutter speed may require the use of a tripod or a stable surface to avoid blurriness caused by hand shake.
Stabilize your Phone: To minimize camera shake and ensure sharp images in low-light conditions, stabilize your phone using a tripod or any other stable surface. If a tripod is not available, try leaning against a solid object or use your surroundings to stabilize your hands. Additionally, using a remote shutter or the self-timer function can further eliminate any movement caused by pressing the shutter button.
Capture Cityscapes: Cityscapes at night offer stunning opportunities for low-light photography. Look for scenes with vibrant lights, buildings, bridges, or other architectural features. Experiment with different exposures and compositions to capture the atmosphere and unique character of the city at night. Utilize leading lines and reflections to add depth and interest to your photos.
Photograph Fireworks: Fireworks are a popular subject for low-light photography. Use a tripod to keep your camera steady, and set a longer exposure time to capture the light trails and bursts. Experiment with different compositions and timing to capture the bursts at their peak. If your smartphone allows manual settings, try setting a lower ISO and a longer shutter speed to achieve the desired effect.
Explore Astrophotography: Astrophotography with a smartphone can be challenging but still achievable. Find a location away from light pollution, preferably with a clear sky. Use a tripod and set the focus manually to infinity. Experiment with different exposure settings, such as longer shutter speeds and higher ISO values, to capture the stars, constellations, or even the Milky Way. There are also apps available that can assist you in identifying celestial objects and planning your astrophotography sessions.
Remember, practice is key to improving your low-light photography skills. Experiment with different techniques, settings, and subjects to discover your own unique style. By mastering the art of low-light photography, you can capture breathtaking images with just your smartphone.

Tripod & Night mode used
11. Advanced Techniques and Accessories
Advanced smartphone photography techniques and accessories can greatly enhance your smartphone camera capabilities and help you take professional-looking photos. Here are some techniques and accessories to consider:
Long Exposure Photography: Long exposure photography involves capturing a scene over an extended period, allowing for creative motion blur effects. To achieve this on a smartphone, you can use various apps specifically designed for long exposures. These apps often offer manual control over shutter speed and provide features like light trails, light painting, and smooth water effects.
External Lenses and Accessories: External lenses can significantly expand the capabilities of your smartphone camera. Here are some popular options:
Wide-angle lens: Provides a wider field of view, great for landscapes and group shots.
Telephoto lens: Allows for zooming in on distant subjects without losing quality.
Macro lens: Enables close-up shots with exceptional detail, ideal for capturing small subjects like flowers or insects.
Fisheye lens: Creates a unique distorted, wide-angle perspective, often used for creative and artistic shots.
Additionally, other accessories such as tripods, stabilizers, and smartphone camera rigs can help stabilize your shots, especially in low-light conditions or when shooting videos.
Shooting in RAW Format: Shooting in RAW format gives you maximum editing flexibility by preserving all the data captured by the camera sensor. Unlike JPEG, which applies compression and image processing, RAW files retain more details and allow for more extensive adjustments in post-processing. To shoot in RAW on a smartphone, you can use third-party camera apps that offer RAW capture functionality.
Manual Camera Controls: Exploring the manual camera controls available in third-party camera apps can greatly improve your photography. These controls include adjusting shutter speed, ISO, white balance, focus, and exposure compensation. Manual control allows you to have precise control over your images and tailor them to your specific creative vision.
External Lighting: Smartphone cameras often struggle in low-light conditions. Consider using external lighting accessories such as portable LED lights or mini softboxes to illuminate your subjects. These accessories can help you achieve better lighting and enhance the overall quality of your photos.
Editing Apps: Post-processing plays a crucial role in smartphone photography. Utilize powerful editing apps like Adobe Lightroom, Snapseed, or VSCO to refine your images. These apps offer a wide range of editing tools and filters that can transform your photos and give them a professional touch.
Remember, the specific techniques and accessories that work best for you will depend on your smartphone model and personal preferences. Experimenting with different options will help you discover the best combination to elevate your smartphone photography skills.
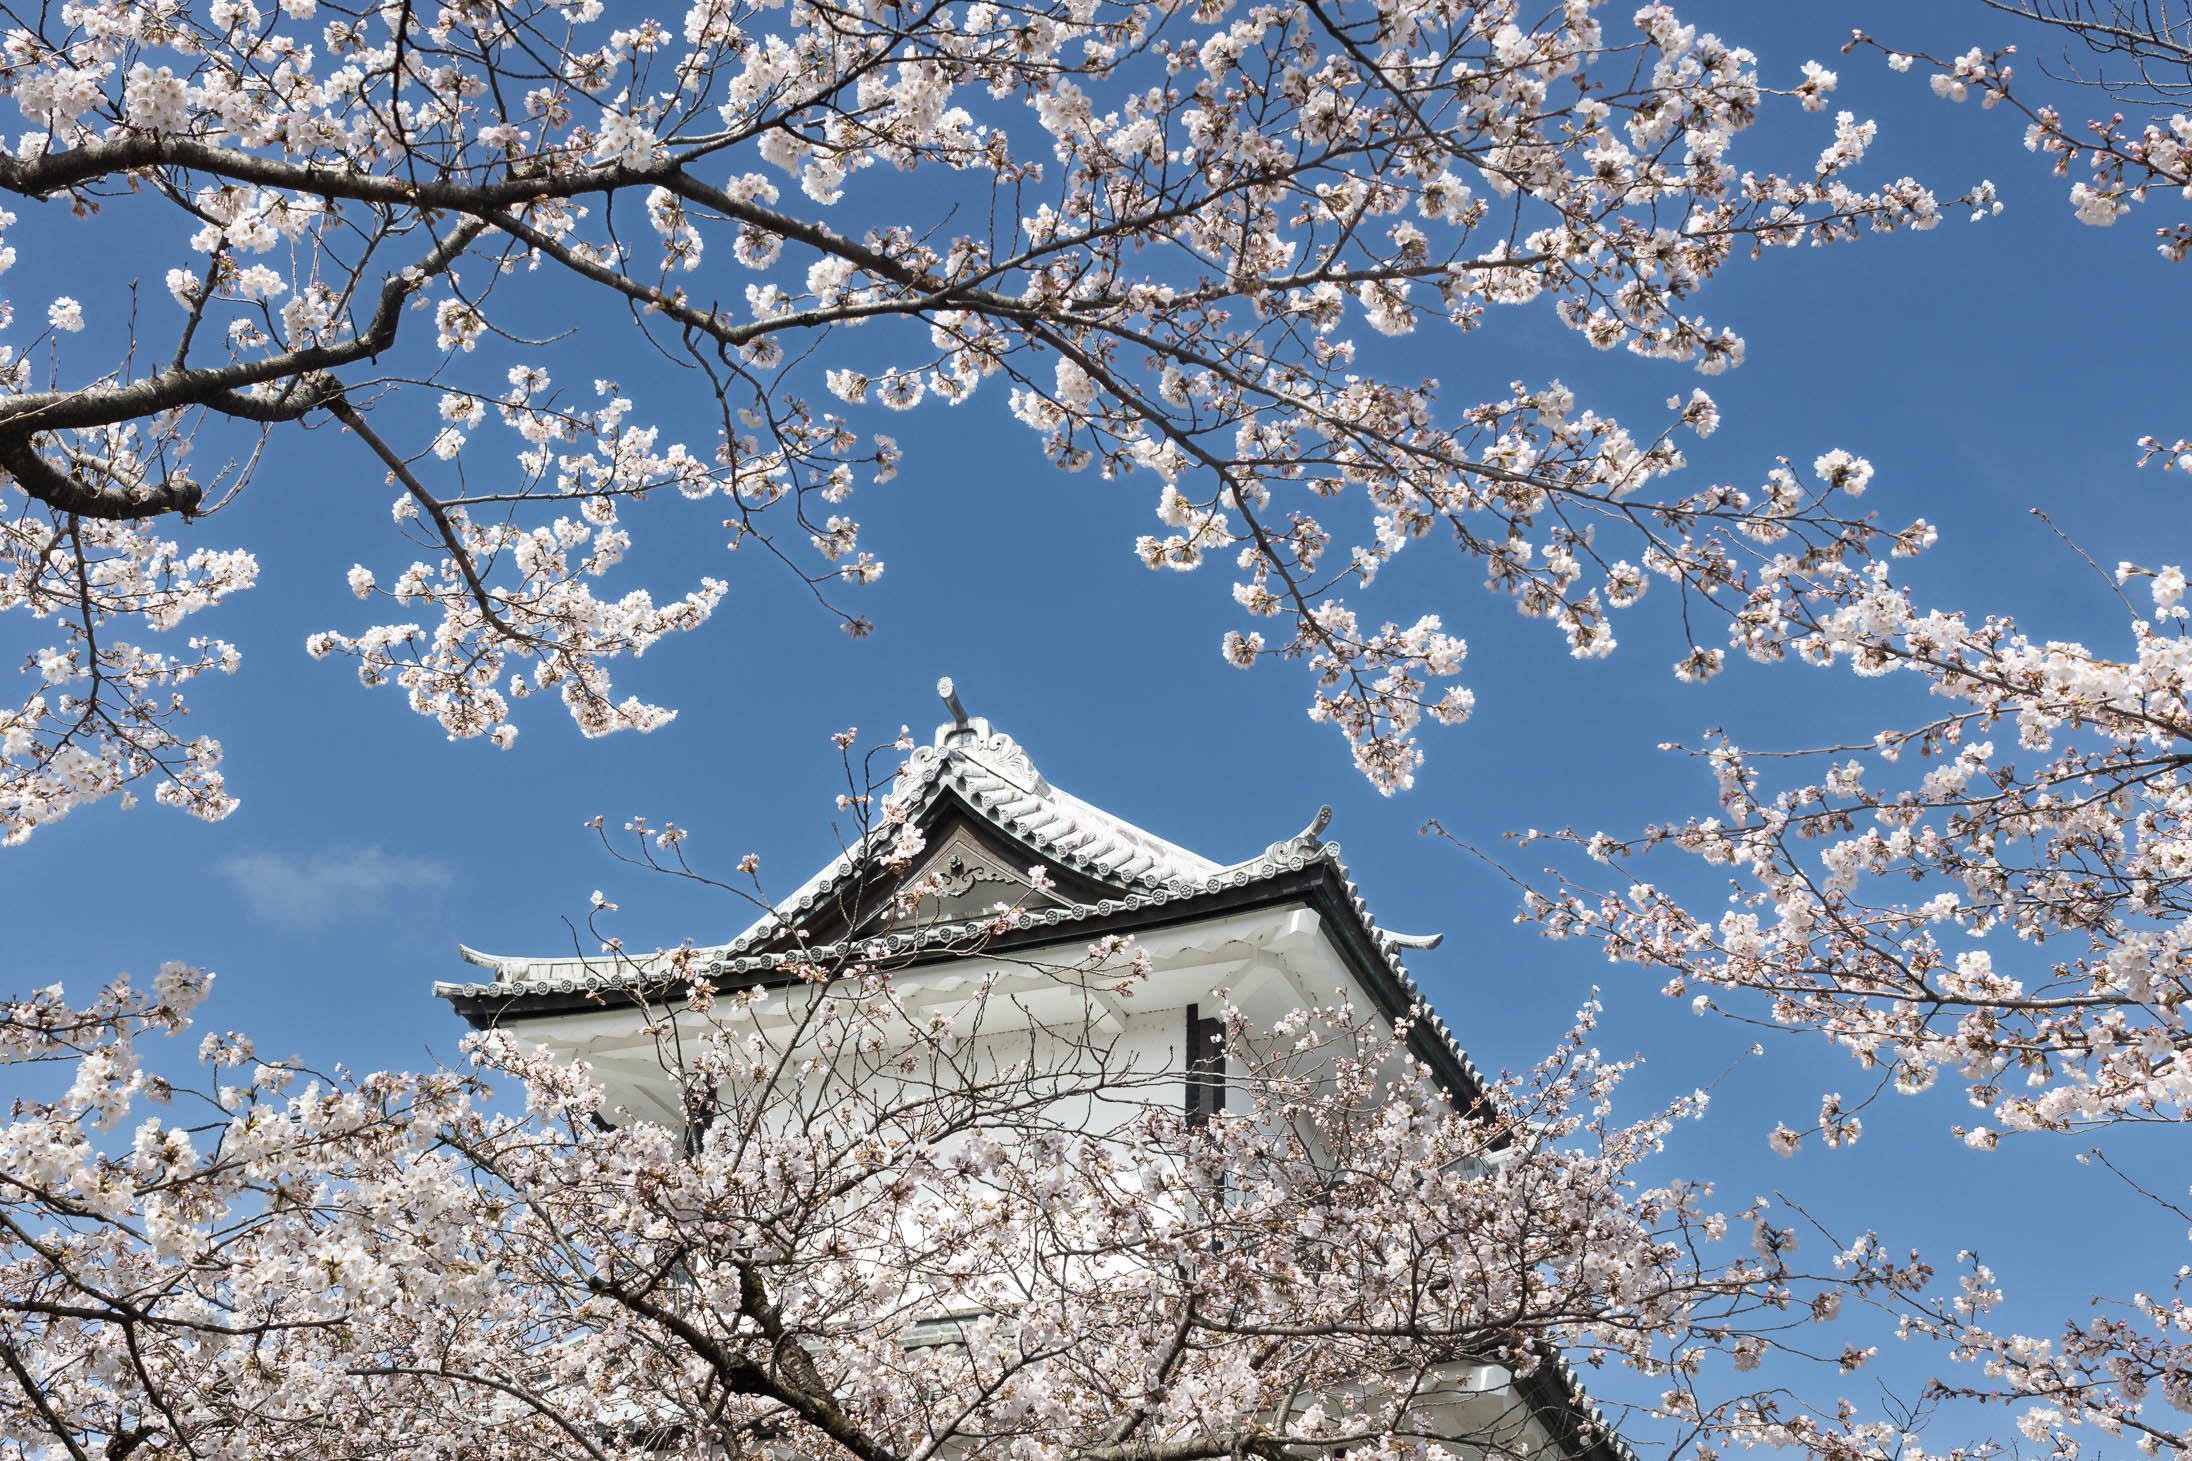
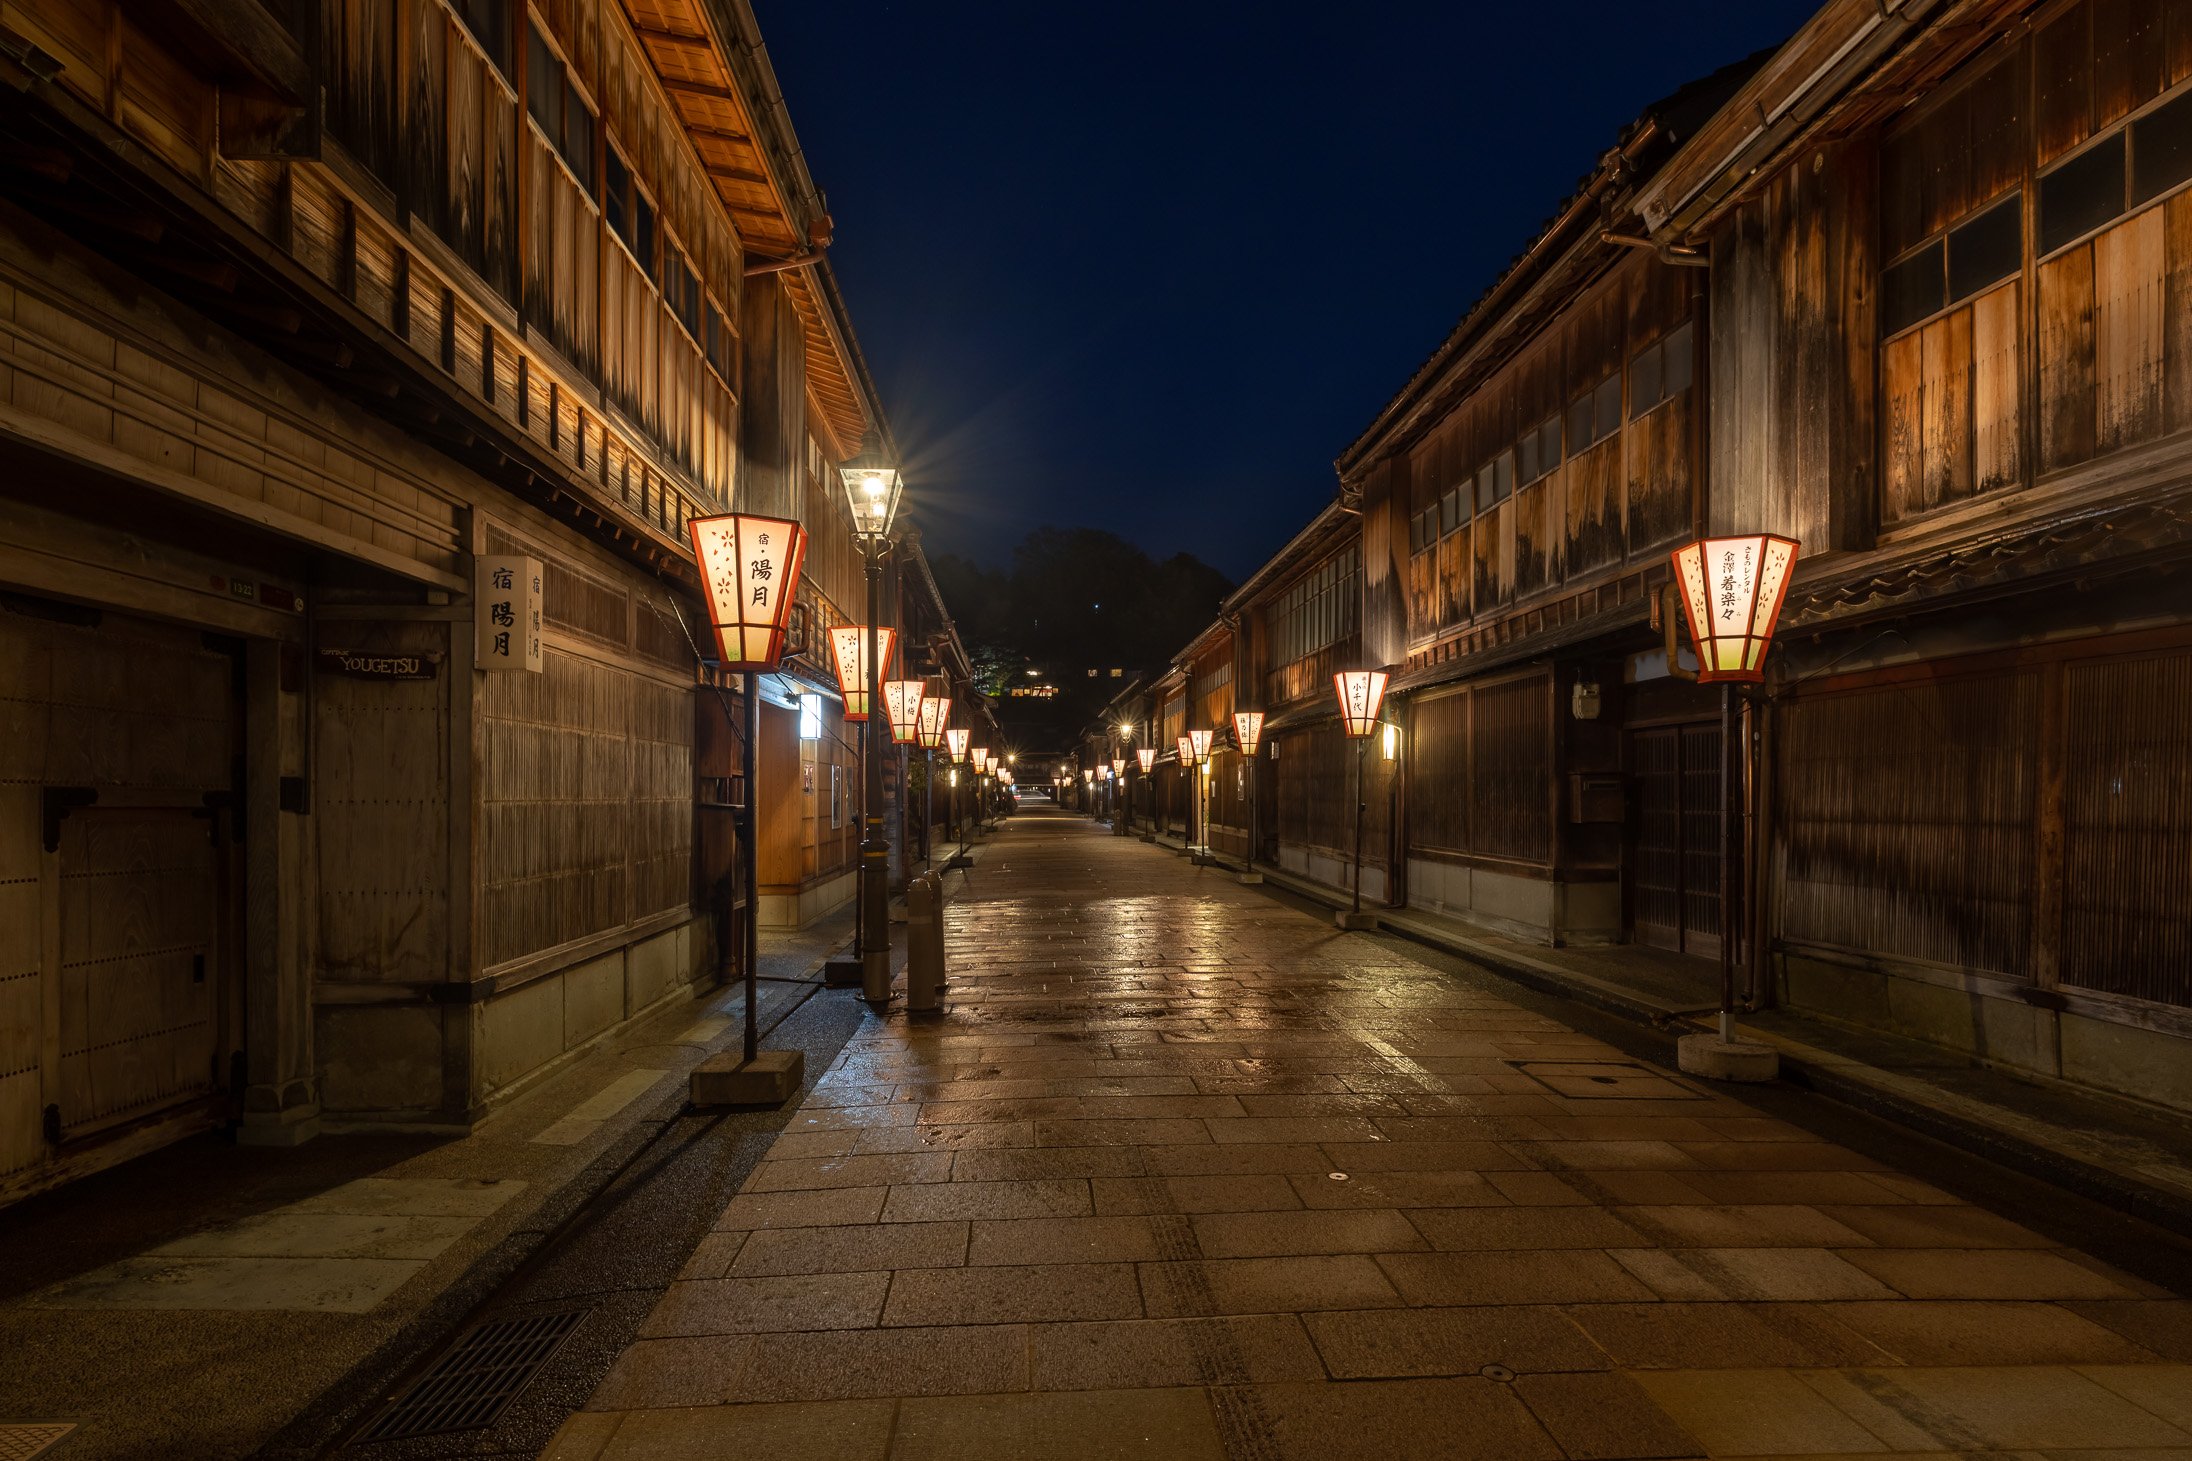
Kanazawa in Spring
12. Sharing and Showcasing Your Photos
Optimizing your photos for social media platforms:
Size and Resolution: Different social media platforms have specific requirements for image sizes and resolutions. To optimize your photos, resize them to match the platform's guidelines. This ensures your photos are displayed correctly and load quickly.
Compression: Compressing your images can reduce file sizes without significantly affecting quality. Many online tools and software applications allow you to compress images while preserving their visual appeal. Smaller file sizes result in faster upload times and better user experiences.
Aspect Ratio: Pay attention to the aspect ratio of your images, especially for platforms like Instagram that emphasize specific dimensions (e.g., square or vertical). Cropping or resizing your photos to match the desired aspect ratio will ensure they appear correctly in users' feeds.
File Format: JPEG is the most commonly used format for web and social media platforms due to its small file size and wide compatibility. However, some platforms, like Twitter, also support PNG and GIF formats. Save your photos in the appropriate format for each platform to optimize their quality and loading times.
Watermarking: If you want to protect your photos from unauthorized use or claim ownership, consider adding a discreet watermark. It can be your name, logo, or a small signature. Numerous tools and software options allow you to add watermarks to your images.
Building an online photography portfolio:
Choose a Platform: Select a suitable platform to showcase your photography portfolio. Popular options include dedicated portfolio websites like Squarespace, WordPress with portfolio themes, or specialized photography platforms like 500px or Behance.
Select Your Best Work: Curate your portfolio by choosing your best and most representative photographs. Focus on quality over quantity and create a cohesive narrative or theme throughout your portfolio. Showcasing a specific style or subject matter can help you stand out.
Organize and Categorize: Structure your portfolio in a logical and user-friendly manner. Arrange your photos into categories or series to make it easier for visitors to navigate and explore your work. Consider adding titles, captions, or descriptions to provide context or storytelling.
Design and Layout: Customize the design and layout of your portfolio to reflect your personal style. Choose a visually appealing template or create a unique design that enhances your photographs. Ensure the design is clean, responsive, and optimized for different devices.
Regular Updates: Keep your portfolio fresh and engaging by regularly updating it with your latest work. Remove older or weaker images that no longer represent your current skills and vision. This demonstrates growth and keeps visitors interested in your evolving photography.

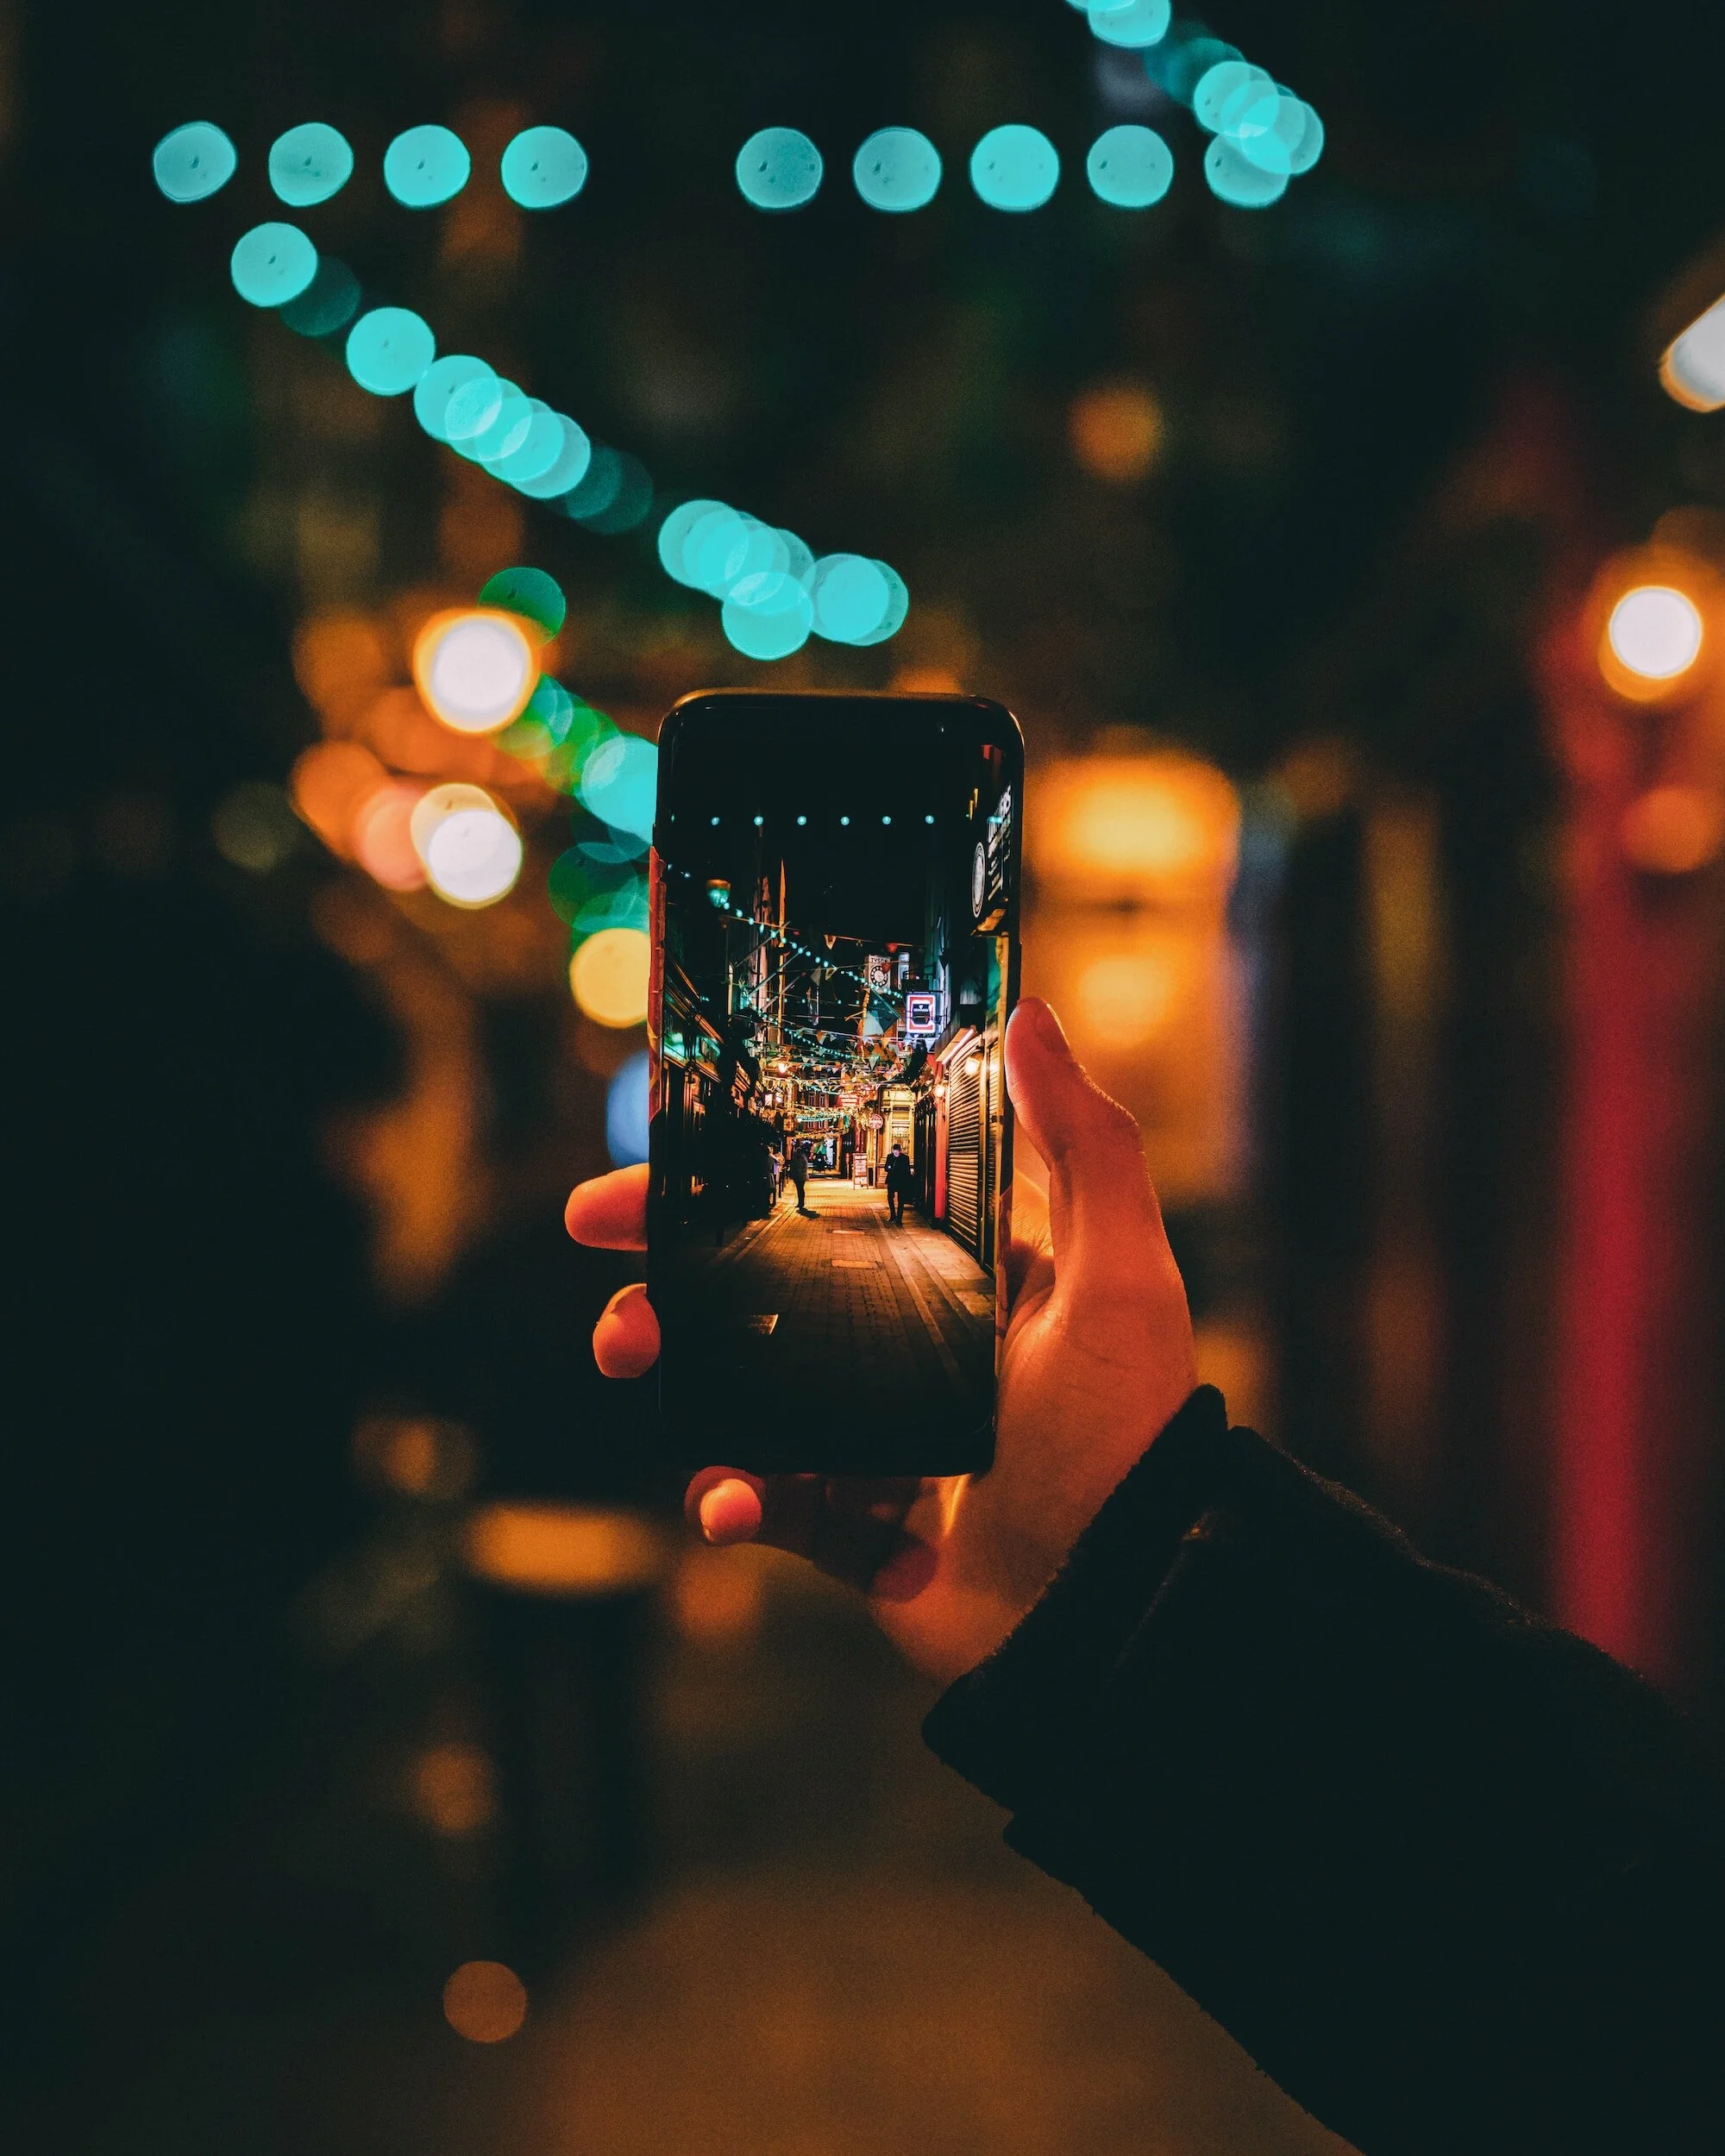
Instagram Post - Kyoto at night handheld
Engaging with the smartphone photography community:
Join Social Media Platforms: Participate in social media platforms dedicated to smartphone photography, such as Instagram, Flickr, or EyeEm. Create an account, share your photos, and engage with other photographers by liking, commenting, and following their work.
Use Hashtags: Utilize relevant hashtags when posting your smartphone photos on social media. This increases the visibility of your work and helps you connect with a broader community of smartphone photographers. Research popular photography hashtags and incorporate them into your posts.
Participate in Challenges and Contests: Many smartphone photography communities and platforms host challenges and contests. Participating in these events not only allows you to showcase your skills but also encourages feedback and engagement from fellow photographers.
Collaborate and Network: Engage with other smartphone photographers by reaching out, collaborating on projects, or attending photography meetups or events. Networking with like-minded individuals can inspire creativity, foster learning opportunities, and lead to valuable connections.
Seek Feedback and Learn: Be open to constructive criticism and seek feedback on your smartphone photography. Join online photography communities or forums where you can share your work for critique and learn from experienced photographers. Embrace continuous learning and improvement to enhance your skills.

Kyoto in Spring
13. Troubleshooting and Common Mistakes
Identifying and troubleshooting common issues in smartphone photography:
Blurry photos: Blurriness can occur due to various reasons, such as camera shake or a moving subject. To avoid this, make sure you stabilize your phone while taking a photo. You can use a tripod or rest your phone on a stable surface. Additionally, tap on the subject on your phone screen to ensure the camera focuses correctly.
Overexposure or underexposure: Lighting conditions can affect the exposure of your photos. If your photo appears too bright (overexposed) or too dark (underexposed), you can adjust the exposure manually on most smartphones. Tap on the screen to focus and then swipe up or down to adjust the exposure level.
Noise in low-light conditions: When taking photos in low-light environments, smartphone cameras tend to introduce noise or graininess. To minimize this, try to stabilize your phone and use the phone's built-in night mode or enable HDR (High Dynamic Range) mode. These features help capture more detail in low-light situations.
Poor composition: Composition plays a crucial role in photography. Avoid common mistakes like placing the subject in the center of the frame all the time. Instead, use the rule of thirds, leading lines, or framing techniques to create visually interesting compositions.
Lack of sharpness: If your photos appear soft or lacking sharpness, it could be due to focusing issues. Ensure that you tap on the subject you want to focus on and wait for the camera to lock focus before taking the shot. Some smartphones also have a manual focus option that allows you to have more control over the focus point.
Avoiding common mistakes for better results in smartphone photography:
Using digital zoom: Digital zoom on smartphones can lead to a loss of image quality. Instead, try to get closer to your subject physically or use optical zoom if your phone has multiple lenses.
Ignoring the phone's camera settings: Many smartphones offer various camera settings and modes. Explore these options to optimize your photos. Experiment with different modes like portrait mode, panorama, or macro mode to capture different types of shots.
Not cleaning the camera lens: Smudges and fingerprints on the camera lens can affect the image quality. Clean the lens regularly with a microfiber cloth to ensure clear and sharp photos.
Overprocessing images: While editing can enhance your photos, be cautious not to overprocess them. Applying too many filters or adjustments can make the image look unnatural. Aim for a balanced and realistic result.
Neglecting to back up photos: Losing your photos due to a phone malfunction or accidental deletion can be heartbreaking. Regularly back up your photos to cloud storage or transfer them to a computer to prevent data loss.
Tips for maximizing battery life and storage space on your smartphone:
Adjust screen brightness: Lowering your screen brightness or enabling auto-brightness can significantly save battery life. Also, consider reducing the screen timeout duration to minimize unnecessary power consumption.
Close unused apps: Running multiple apps in the background can drain your battery. Close unused apps or use the phone's multitasking menu to close them all at once.
Disable unnecessary notifications: Unnecessary notifications can drain battery life by constantly waking up your phone's screen. Disable notifications for apps that are not essential.
Enable battery-saving mode: Most smartphones have a battery-saving mode that limits background processes and reduces performance to extend battery life. Activate this mode when your battery is running low.
Clear cache and unused apps: Regularly clear the cache of your apps, as accumulated cache data can take up storage space. Uninstall unused apps to free up even more storage.
Use cloud storage or external storage: Upload your photos, videos, and other large files to cloud storage services like Google Drive or Dropbox. Alternatively, use external storage options like microSD cards or USB OTG (On-The-Go) drives to expand your phone's storage capacity.
Delete unnecessary files: Regularly go through your phone's storage and delete unnecessary files like old photos, videos, downloaded files, and app caches to free up space.
Limit background data usage: Some apps consume data in the background, which can drain your battery and consume storage space. Restrict background data usage for apps that you don't need to constantly update in the background.
By following these troubleshooting steps, avoiding common mistakes, and implementing battery and storage optimization tips, you can improve your smartphone photography experience and maximize the performance of your device.

Philosophers Path - Kyoto
14. Conclusion
Throughout our discussion, we covered several key concepts and techniques that can help you improve your smartphone photography skills. Here's a recap of what we learned:
Composition: Pay attention to elements like the rule of thirds, leading lines, and symmetry to create visually pleasing and balanced photographs.
Lighting: Understand the importance of lighting and how it can dramatically impact the mood and quality of your photos. Experiment with natural light, golden hour, and artificial lighting techniques.
Exposure and focus: Learn how to control exposure and focus manually to achieve the desired effect. Tap on your smartphone screen to adjust focus and exposure points.
Editing: Utilize photo editing apps to enhance your images, adjusting aspects such as brightness, contrast, color balance, and applying filters. Experiment with different editing styles to find your unique visual aesthetic.
Macro and close-up photography: Explore the world of small details and capture intriguing macro shots using smartphone lens attachments or built-in macro modes.
Portrait photography: Experiment with portrait mode and utilize techniques like depth of field, framing, and capturing candid moments to create compelling portraits.
HDR and panoramic photography: Take advantage of your smartphone's HDR mode to capture scenes with a high dynamic range. Additionally, use the panoramic feature to capture wide landscapes and cityscapes.
Experimentation and practice: Embrace experimentation and practice regularly to improve your skills. Try different angles, perspectives, and subjects to push your creative boundaries.
Encouragement:
Now that you have gained a deeper understanding of smartphone photography, I encourage you to put your knowledge into practice and continue exploring this creative medium. Don't be afraid to experiment with different techniques, subjects, and styles. Photography is an art form, and it's through experimentation and practice that you'll discover your unique voice and develop your skills further.
Additional resources:
If you're looking for further learning and inspiration, here are some additional resources you can explore:
Online tutorials and courses: Websites like Udemy, Coursera, and YouTube offer a wide range of smartphone photography courses and tutorials.
Photography communities: Join online photography communities, such as forums, social media groups, and photo-sharing platforms, to connect with other photographers, share your work, and gain inspiration.
Photography apps: Explore photography apps like VSCO, Snapseed, and Adobe Lightroom, which not only provide editing tools but also feature communities and curated content to inspire your creativity.
Photography books: There are numerous books available on smartphone photography, composition, and creativity. Some popular titles include "The Art of iPhone Photography" by Bob Weil and Nicki Fitz-Gerald and "The Mobile Photographer" by Robert Fisher.
Attend workshops and exhibitions: Look for local workshops or exhibitions in your area where you can learn from experienced photographers and gain exposure to different styles and approaches.
Remember, the journey of improving your smartphone photography skills is a continuous one. With passion, dedication, and the willingness to experiment, you can capture stunning images and express your unique perspective through this powerful and accessible medium. Happy photographing!
Note: This ebook aims to provide a comprehensive guide to smartphone photography, covering various aspects from basic techniques to advanced tips and editing. The content can be expanded or customized based on your level of expertise.

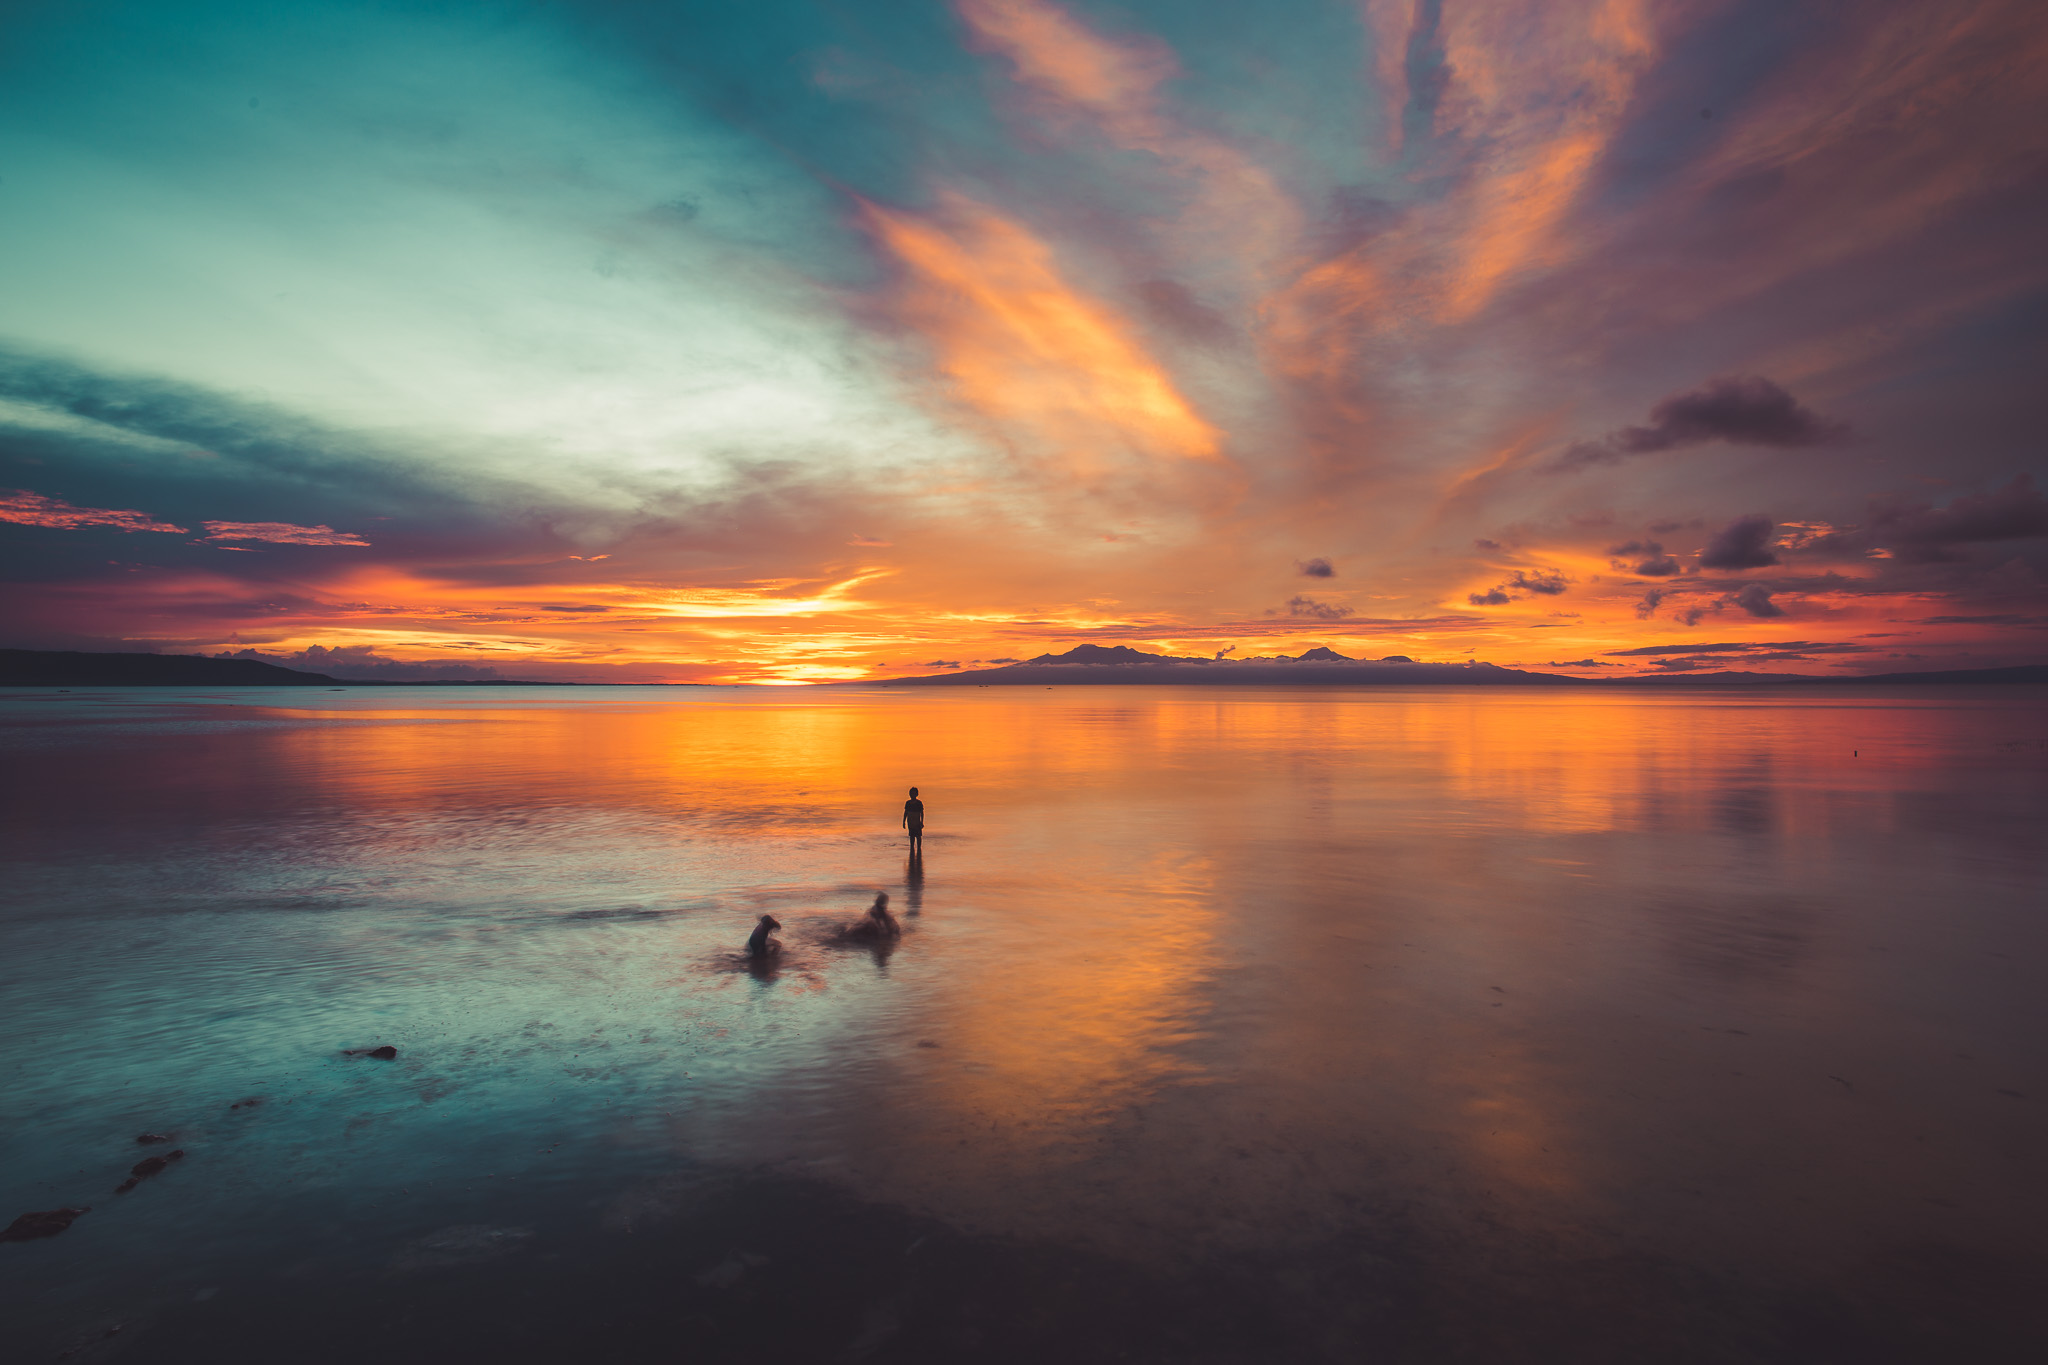
Kyoto Sunset
BONUS EXTRA
Psychology in Photography
Photography in my opinion is a collection of your memories. There are visual triggers that lead to us being attracted to certain objects and subjects to capture what we individually feel are comforting or thought provoking images. Colour and shapes can help accentuate the feeling and emotions we wish to evoke in a photo.
The Psychology Of Colour
The psychology of color plays a significant role in various aspects of photography, including composition, mood, and visual storytelling. Colors can evoke different emotions, create a sense of harmony or tension, and even influence how viewers perceive and interpret an image. Here are some key aspects to consider regarding the psychology of color in photography:
Emotional Impact: Colors have the power to evoke specific emotions and feelings. Warm colors like red, orange, and yellow tend to create a sense of energy, excitement, and passion. Cool colors like blue, green, and purple often convey calmness, tranquility, and introspection. Understanding the emotional impact of colors can help photographers elicit specific responses from viewers.
Contrast and Visual Hierarchy: Colors can be used to create contrast and establish visual hierarchy within a photograph. Vibrant or saturated colors tend to attract attention and can serve as focal points in an image. On the other hand, muted or desaturated colors can create a more subtle and harmonious atmosphere.
Color Harmony: Colors can be combined in various ways to create a harmonious or discordant effect. Complementary colors (opposite each other on the color wheel) can create a strong visual impact and a sense of balance. Analogous colors (adjacent on the color wheel) create a more harmonious and soothing effect. Understanding color relationships can help photographers create visually pleasing compositions.
Cultural and Contextual Associations: Colors often carry cultural and contextual associations that can influence how they are perceived. For example, red may symbolize love and passion in Western cultures, while it can signify luck and celebration in some Eastern cultures. Additionally, colors can be associated with specific themes or subjects. For instance, green is often linked to nature and growth, while blue can be connected to water and tranquility.
Personal Interpretation: It's important to note that individual experiences, memories, and cultural backgrounds can shape how people perceive and interpret colors. While there are general psychological associations with colors, it's essential to consider the subjective responses of viewers as well.
When incorporating the psychology of color into photography, photographers can experiment with various color palettes, lighting conditions, and post-processing techniques to enhance the emotional impact and visual storytelling of their images. It's crucial to understand the intended message or mood and how different colors can help communicate that effectively to the viewer.

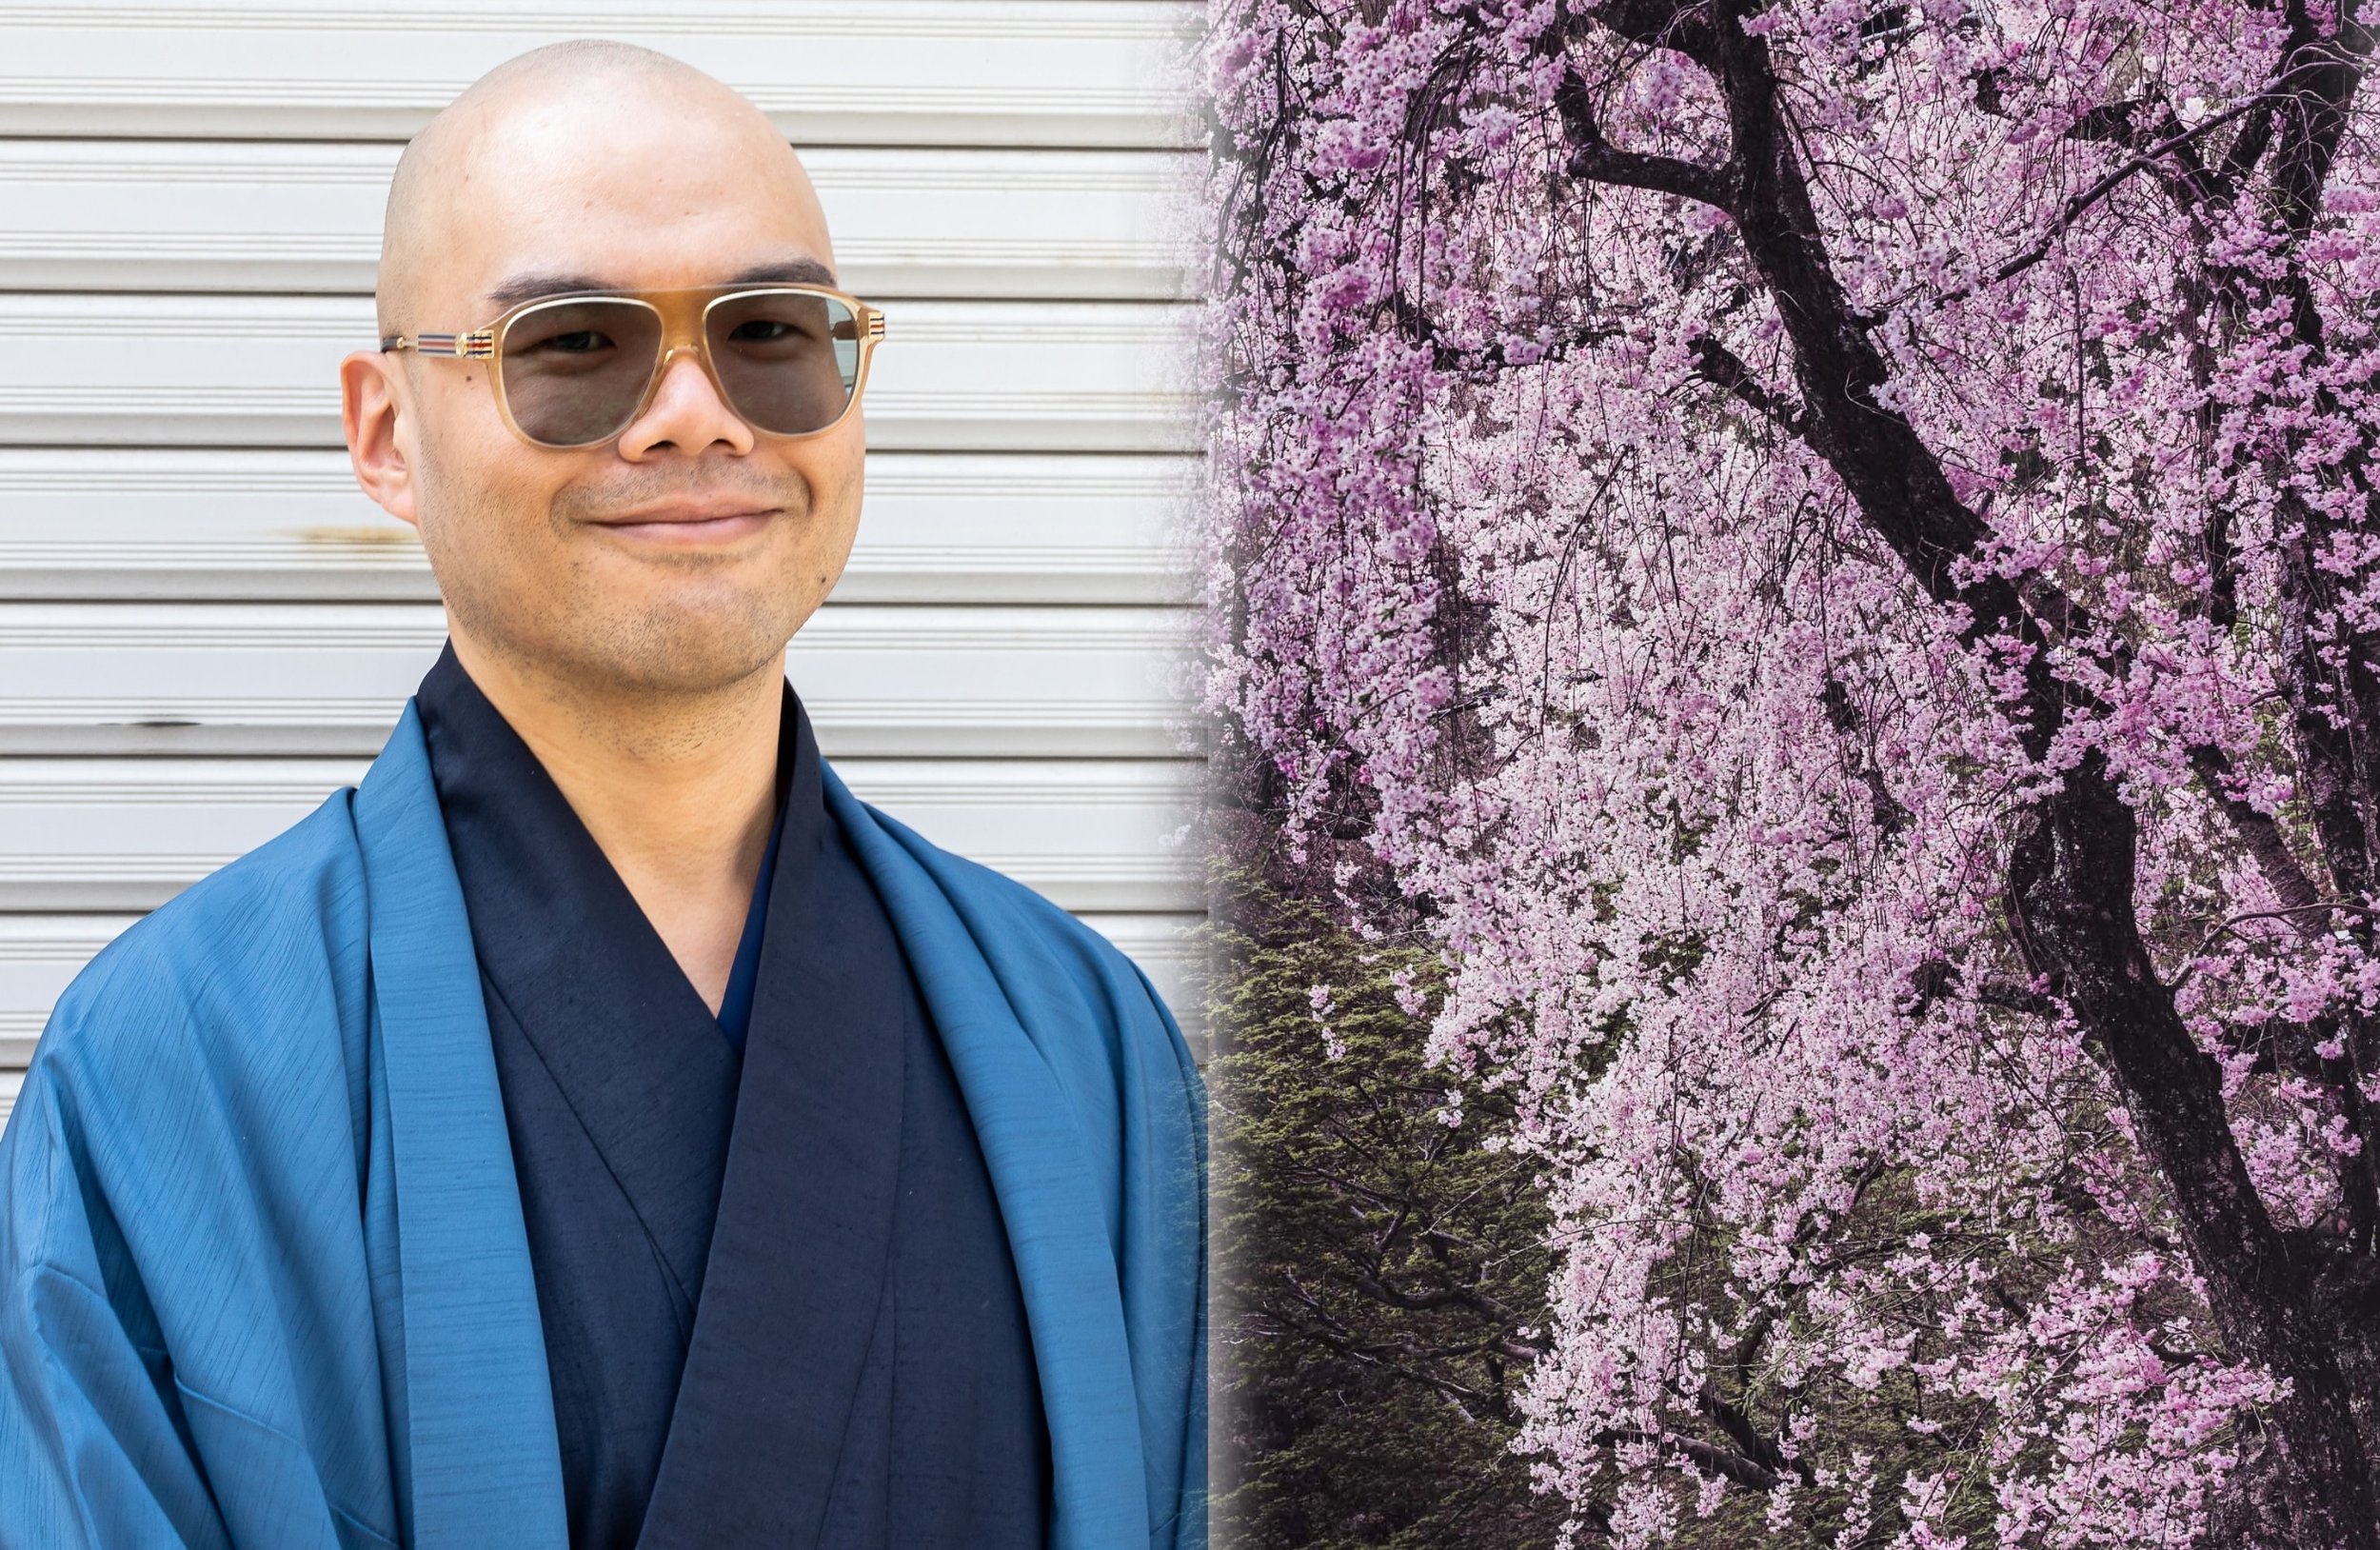
Tokyo Cherry Blossoms
Hokkaido in Winter
WHITE
Purity and Innocence: White is often associated with purity, cleanliness, and innocence. It is commonly used in weddings, christenings, and other ceremonial occasions to represent new beginnings and a clean slate.
Simplicity and Minimalism: White is often associated with simplicity and minimalism. It can evoke a sense of clarity, openness, and spaciousness. Many minimalist designs and modern interiors incorporate white to create a sense of calm and tranquility.
Perfection and Precision: White is often associated with precision, accuracy, and perfection. In fields such as science, medicine, and technology, white is used to convey a sense of professionalism, accuracy, and attention to detail.
Sterility and Coldness: While white can represent cleanliness and purity, an excessive use of white or a stark white environment can also create a sterile and cold atmosphere. This association is often found in medical settings, where white is used to convey sterility and hygiene.
Positive Emotions: White is often associated with positive emotions such as joy, happiness, and hope. It can evoke feelings of lightness, positivity, and optimism.
Clarity and Objectivity: White is often associated with clarity and objectivity. It is used in graphic design, data visualization, and presentations to create a clean and clear visual representation of information.
Spirituality and Transcendence: In some cultures and religious contexts, white is associated with spirituality, transcendence, and enlightenment. It can symbolize purity of the soul, spiritual awakening, or divine presence.

Arthurs Lake - Tasmania

Dried Fish - Faroe Islands
BLACK
Symbolism: Black is often associated with concepts such as darkness, mystery, power, authority, elegance, formality, and sophistication. It can convey a sense of seriousness, control, and intensity.
Emotions: Black can evoke different emotional responses depending on the context. It may evoke feelings of strength, resilience, and protection, but it can also be associated with negative emotions such as fear, grief, or sadness. Black is often connected to mourning in many cultures.
Individual Interpretations: Personal experiences, cultural backgrounds, and individual preferences can significantly influence how people perceive and respond to the color black. Some individuals may find black to be comforting and reassuring, while others may associate it with negativity or even perceive it as cold and oppressive.
Visual Impact: Black is known for its ability to create contrast and enhance the visibility of other colors. It is commonly used to make other elements stand out, such as in graphic design, fashion, and advertising.
Context and Associations: The meaning of black can vary depending on the specific context and associations. For example, black is often used to represent authority and power in formal settings, such as black suits worn by professionals. It can also be associated with rebellion and counterculture, as seen in the fashion industry or certain subcultures.
Perceptions of Black: In terms of perception, black is the absence of light and color. It can create a sense of depth or emptiness, and it is often associated with silence and stillness.


Blood Red Uluru Sunrise
RED
Emotion and Passion: Red is often linked to strong emotions such as love, anger, and excitement. It can elicit feelings of passion, desire, and power. The color is frequently used to symbolize love and romance.
Attention and Alertness: Red is a highly stimulating color that grabs attention and stands out in our visual field. It has the longest wavelength in the visible spectrum, making it physically more noticeable. As a result, it is commonly used to signal caution, urgency, or importance, such as in warning signs, stop signs, or emergency signals.
Energy and Vitality: Red is associated with energy and vigor. It can boost arousal levels, increase heart rate, and stimulate the senses. In some cases, exposure to the color red has been shown to enhance physical performance and improve attention to detail.
Aggression and Intensity: Red is also associated with aggression, anger, and dominance. It can evoke feelings of power and assertiveness. In certain contexts, such as sports or competitive environments, the color red has been found to influence competitive behavior and outcomes.
Appetite and Food: Red is often used in food branding and advertising due to its potential to stimulate appetite. It has been suggested that the color red can increase hunger and evoke a sense of urgency in relation to food consumption.
Symbolism and Cultural Meanings: The meaning and symbolism of red can vary across different cultures and contexts. For example, in Western cultures, red can represent love, passion, and danger. In some Eastern cultures, it symbolizes luck, celebration, and happiness.

Waterfalls Mt. Fuji Area

Faroe Islands
GREEN
Nature and Harmony: Green is strongly linked to nature, plants, and the environment. It symbolizes growth, freshness, and vitality. Being surrounded by greenery or even looking at the color green can evoke feelings of peace, harmony, and balance.
Relaxation and Calmness: Green has a calming effect on the mind and body. It is believed to have a positive impact on stress reduction and can help to create a sense of relaxation and tranquility. Many people find spending time in nature or engaging with green spaces to be rejuvenating.
Healing and Renewal: Green is often associated with healing and renewal. It is commonly used in healthcare settings as it is believed to promote a sense of well-being and aid in recovery. The color green can also symbolize new beginnings and a fresh start.
Balance and Harmony: Green is considered a harmonizing color that can bring balance and stability to our emotions and thoughts. It is often associated with the heart chakra in spiritual practices, representing love, compassion, and emotional equilibrium.
Growth and Renewal: As green is the color of plants and vegetation, it is often linked to growth, fertility, and abundance. It can inspire feelings of hope, optimism, and personal development. Green can be particularly motivating for those seeking progress and change in their lives.
Environment and Sustainability: With the increasing awareness of environmental issues, the color green has come to symbolize sustainability, eco-friendliness, and environmental consciousness. It is often used in branding and design to represent companies or products that prioritize environmental responsibility.

Faroe Islands in Summer

Blue Abstract Water
BLUE
Calming and Relaxing: Blue is often perceived as a soothing and calming color. It has a tranquilizing effect on the mind and can help reduce anxiety and stress. Many people find that being in blue surroundings or looking at the color blue can evoke a sense of serenity and promote a feeling of relaxation.
Trust and Security: Blue is often associated with feelings of trust, reliability, and security. It is frequently used in corporate logos and branding to create a sense of dependability and credibility. Blue can also be perceived as a symbol of loyalty and integrity.
Productivity and Focus: Blue is thought to stimulate productivity and enhance concentration. It is often recommended for work environments or study spaces as it can promote mental clarity and focus. However, using too much blue in an environment may lead to feelings of coldness or detachment.
Intelligence and Confidence: Blue is sometimes associated with intelligence and competence. It is often seen as a professional color and is commonly worn in business settings. People wearing blue attire may be perceived as more confident and capable.
Sadness and Melancholy: While blue is generally considered a positive color, it can also evoke feelings of sadness or melancholy. The phrase "feeling blue" is often used to describe a state of sadness or depression. The association of blue with these emotions may be due to cultural or individual factors.
Coolness and Serenity: Blue is frequently associated with coolness, such as the color of water or the sky. It can create a sense of spaciousness and openness. Lighter shades of blue are often used in bedrooms or spaces meant for relaxation due to their serene qualities.

Barangaroo, Sydney


Ueno, Tokyo in April
PINK
Pink: Pink is often linked to femininity, tenderness, and nurturing. It can evoke feelings of love, compassion, and playfulness. Pink is generally seen as a calming color that promotes relaxation and soothes emotions. It can also represent sweetness and innocence.

Uluru Sunset
YELLOW & ORANGE
Yellow: Yellow is often associated with feelings of happiness, optimism, and warmth. It can stimulate mental activity, creativity, and communication. Yellow can also grab attention and promote a sense of cheerfulness. However, excessive yellow can be overwhelming and may evoke feelings of caution or anxiety.
Orange: Orange combines the energy of red and the happiness of yellow. It is associated with enthusiasm, excitement, and warmth. Orange can create a sense of adventure and stimulate social interaction. It can also represent creativity and motivation. However, like yellow, too much orange can become overwhelming.

Asturias Spain Sunset
PURPLE & VIOLET
Violet: Violet is associated with spirituality, imagination, and creativity. It has a soothing and calming effect on the mind and is often linked to introspection and reflection. Violet can symbolize luxury, elegance, and wisdom. It is a color that stimulates the imagination and encourages inspiration.
Purple: Purple is often associated with royalty, power, and luxury. It combines the stability of blue with the energy of red. Purple can evoke feelings of creativity, spirituality, and mystery. It is also linked to introspection and intuition. Purple can be used to promote a sense of luxury or to stimulate artistic endeavors.

Siquijor Island, The Philippines

Uluru Golden Hour
BROWN
Brown: Brown is a color often associated with the earth, nature, and reliability. It can evoke a sense of warmth, stability, and comfort. Brown is often seen as a grounding color that promotes a feeling of security. It can also represent simplicity, practicality, and reliability.

Uluru, Australia
Kyoto, Japan
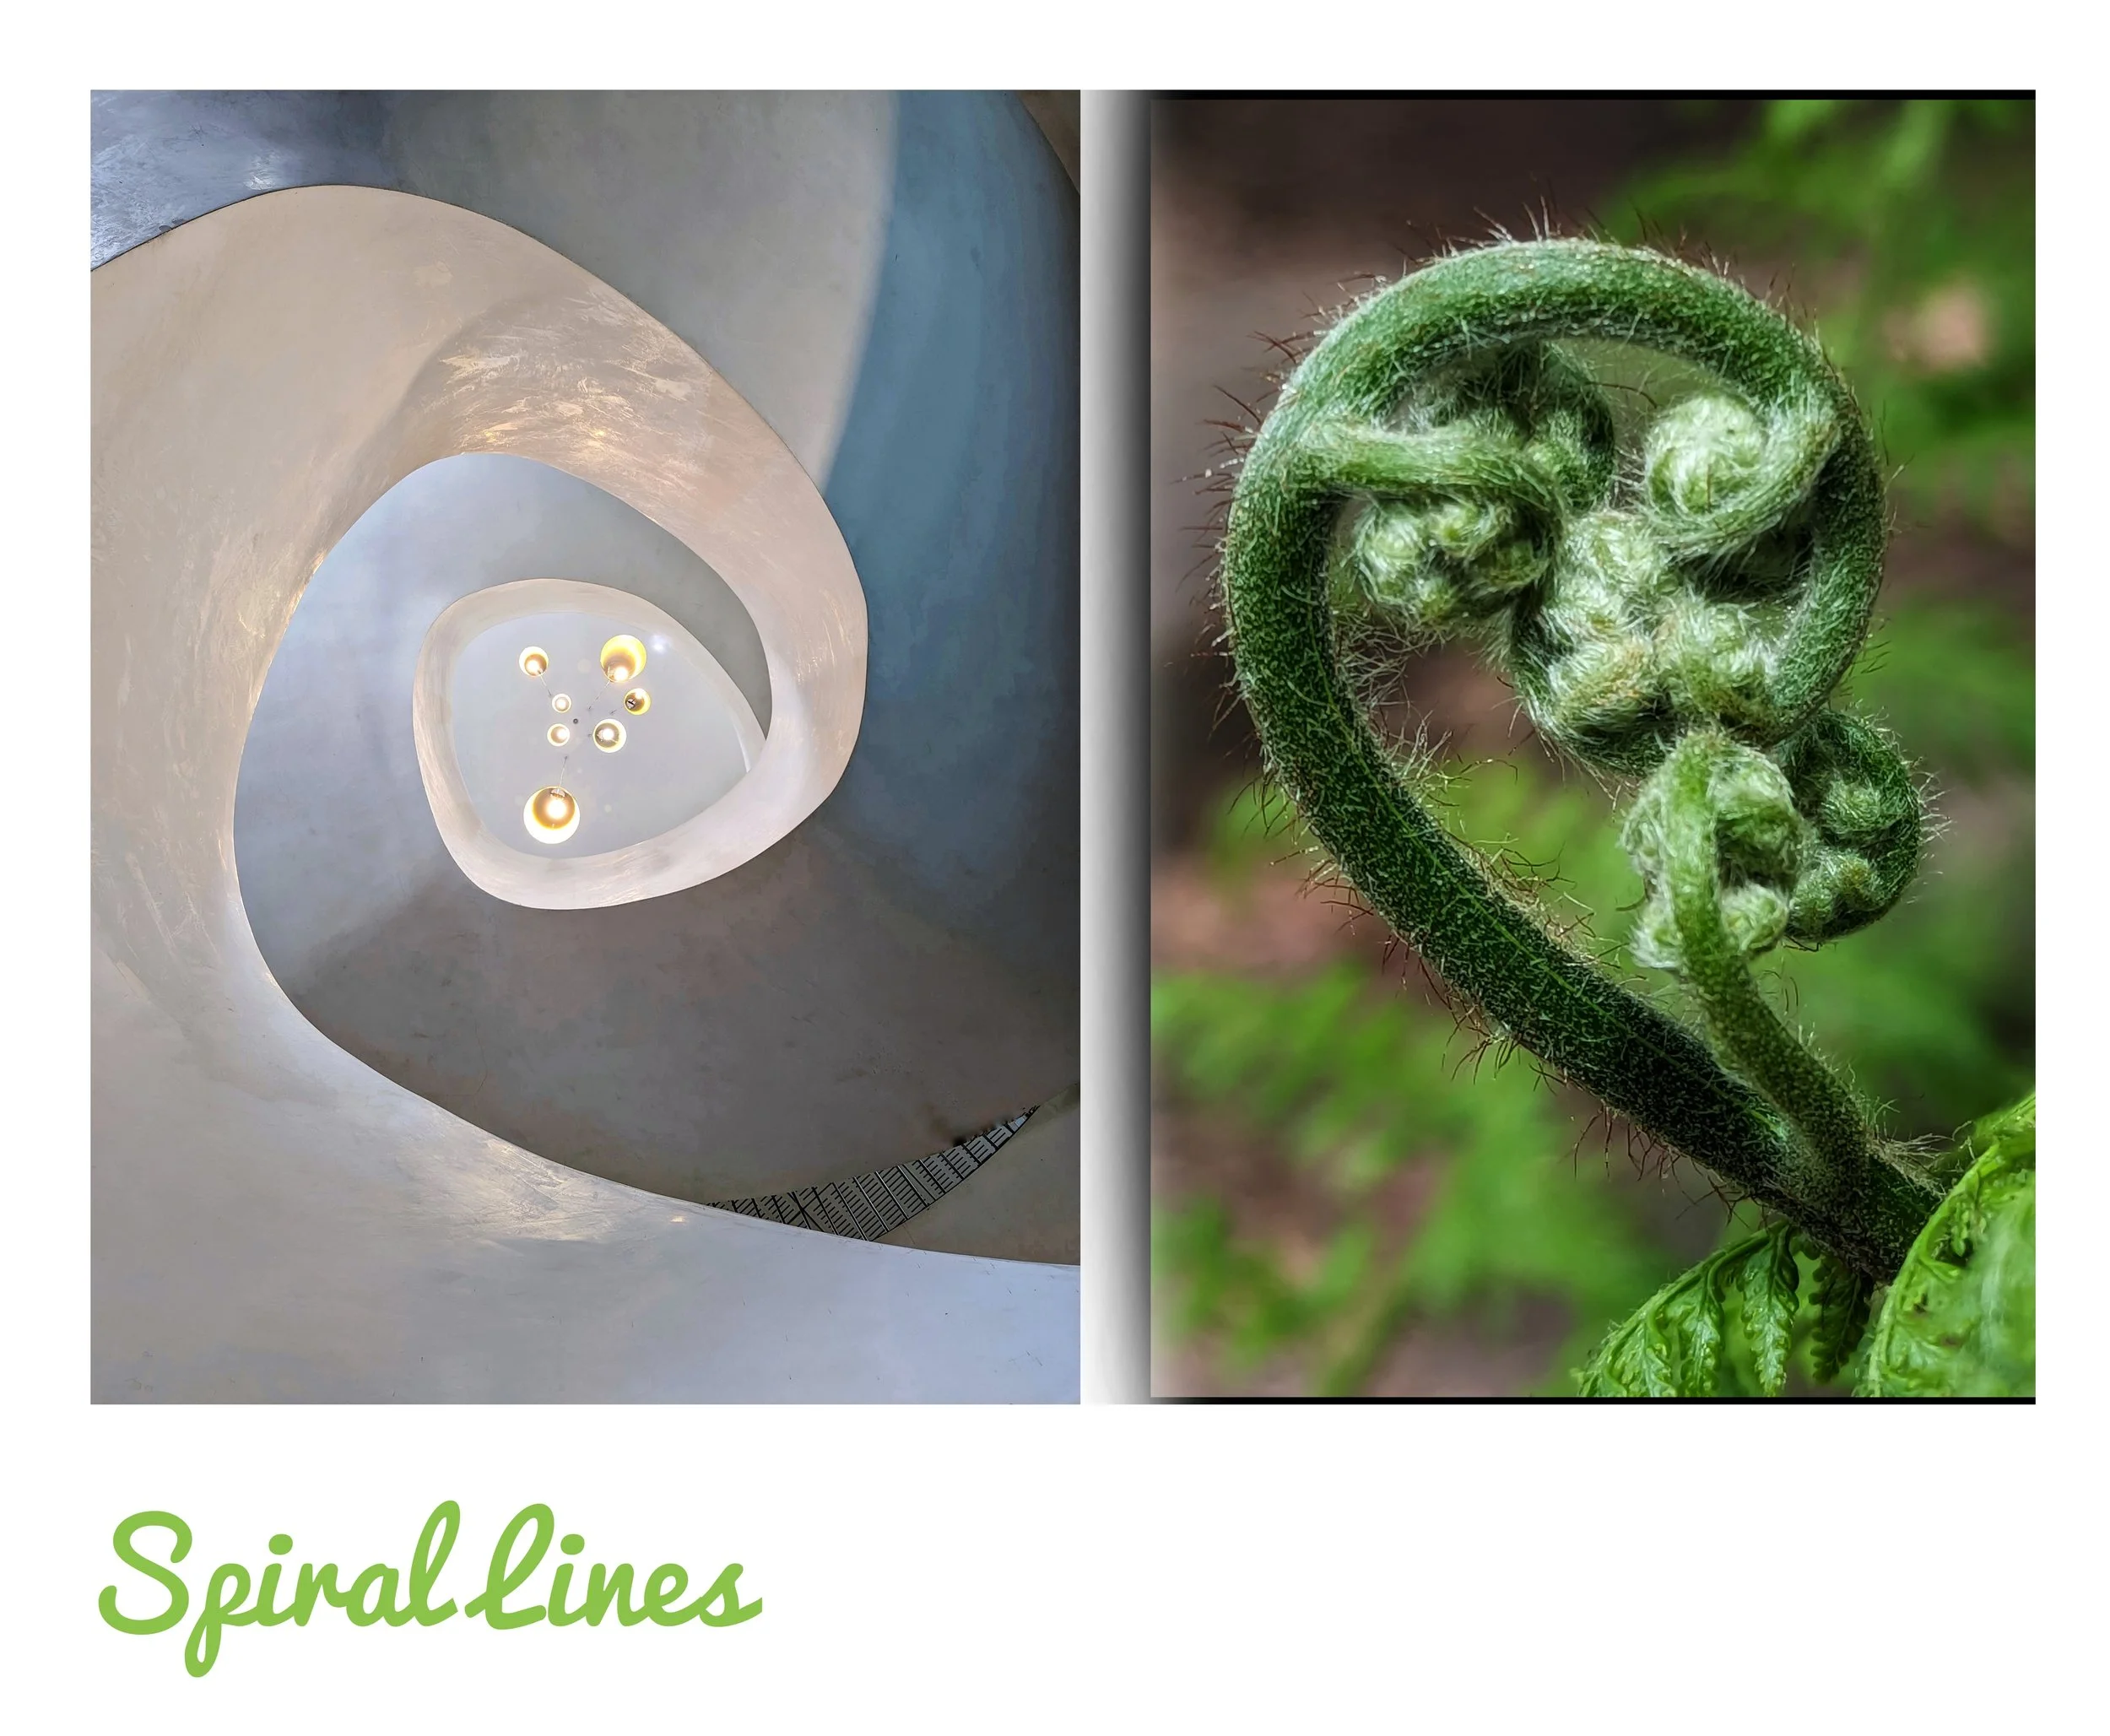
The Psychology of Shapes in Photography
The psychology of shapes in photography refers to the study of how different shapes and their characteristics can evoke certain emotions, perceptions, and reactions in viewers. Shapes are fundamental elements of visual composition and can play a significant role in influencing the psychological impact of a photograph. Here are some common shapes and their psychological associations:
It's important to note that the psychological impact of shapes can also be influenced by color, lighting, context, and personal experiences. Different individuals may interpret shapes in photography differently based on their cultural background and individual perceptions. Therefore, understanding the psychology of shapes can help photographers communicate specific emotions or messages effectively, but it's important to consider the overall composition and context of the image.

Circle Shaped Lily Pads -Sado Island
Circle Shape
No angles means softer or milder. Circles often convey a sense of eternity as they keep looping back to the same point.
Circles: Circles are often associated with unity, harmony, and perfection. They can create a sense of calmness, balance, and continuity. Circles can also evoke feelings of protection and nurturing. In photography, circular shapes can be found in objects like sunsets, full moons, or round architectural elements.

Rectangle in shape in pool - Bondi Icebergs
Square & Rectangle Shape
Formed by straight lines and right angles which convey a sense of reliability and security. Feeling of safety and containment.
Squares and Rectangles: Squares and rectangles are associated with stability, order, and rationality. These shapes often convey a sense of reliability, balance, and structure. They can create a feeling of solidity and represent man-made objects or architectural elements.
Triangle Shape in sky and foreground - Kanazawa Tea District
Triangle Shape
A Polygon with 3 edges and 3 vertices which often depict an ambiance of energy and dynamic shape. Triangles also convey motion and direction.
Triangles: Triangles are dynamic shapes that can convey a sense of tension, energy, and movement. They are often associated with power, strength, and stability. In photography, triangles can be created by converging lines or by composing the image with triangular shapes, leading the viewer's eye towards a focal point.

Sea Eagles Wing Natural Shapes - Hokkaido, Japan
Natural Shapes
They are more organic and represent elements we can relate to in the natural world such as flora and fauna. These shapes are often formed by angles and points.
Curved Lines: Curved lines are organic and flowing, often associated with grace, softness, and elegance. They can create a sense of tranquility and evoke emotions like calmness and relaxation. In photography, curved lines can be found in natural landscapes, flowing rivers, or the contours of a person's body.

Sydney Dusk
Abstract Shapes
Often shapes that repeat themselves with or without order in a pattern. Sometimes creating order in the chaos or rhythm in the object or subject hard to decipher or contain.
Zigzag Lines: Zigzag lines are dynamic and create a sense of energy, excitement, and action. They can convey a feeling of chaos or instability. Zigzag lines can be used to add a sense of movement or tension in a photograph, capturing the viewer's attention and adding visual interest.
Geometric Patterns: Geometric patterns, such as grids or repeating shapes, can create a sense of order, precision, and efficiency. They often convey a modern and organized aesthetic. Geometric patterns can be found in architectural photography or in man-made structures.